The Apex-enabled builds of Mako are found in the MakoApexSDK folder in your Global Graphics support FTP account. If it is not visible, please contact Global Graphics, as Apex is licensed via an addendum to your Mako agreement.
This getting started guide explains what you need to get your first Apex project built and running. These are the topics it covers:
Installing Vulkan
Apex on Windows
Apex on macOS
Mako 8.1 offers a simple way to evaluate Apex in the context of an existing project that makes use of the Jaws renderer (IJawsRenderer class). Refer to this page for further details.
Installing Vulkan
Vulkan must be installed in order to build an Apex-enabled Mako project.
The Vulkan SDK is a cross-platform, low-overhead graphics and compute API for GPUs. We chose Vulkan so that the Apex developers could use low-level, performant APIs to access GPU functions without having to worry about the differences in implementations from the various GPU vendors, such as NVidia & AMD. Plus it’s cross-platform, which was also necessary.
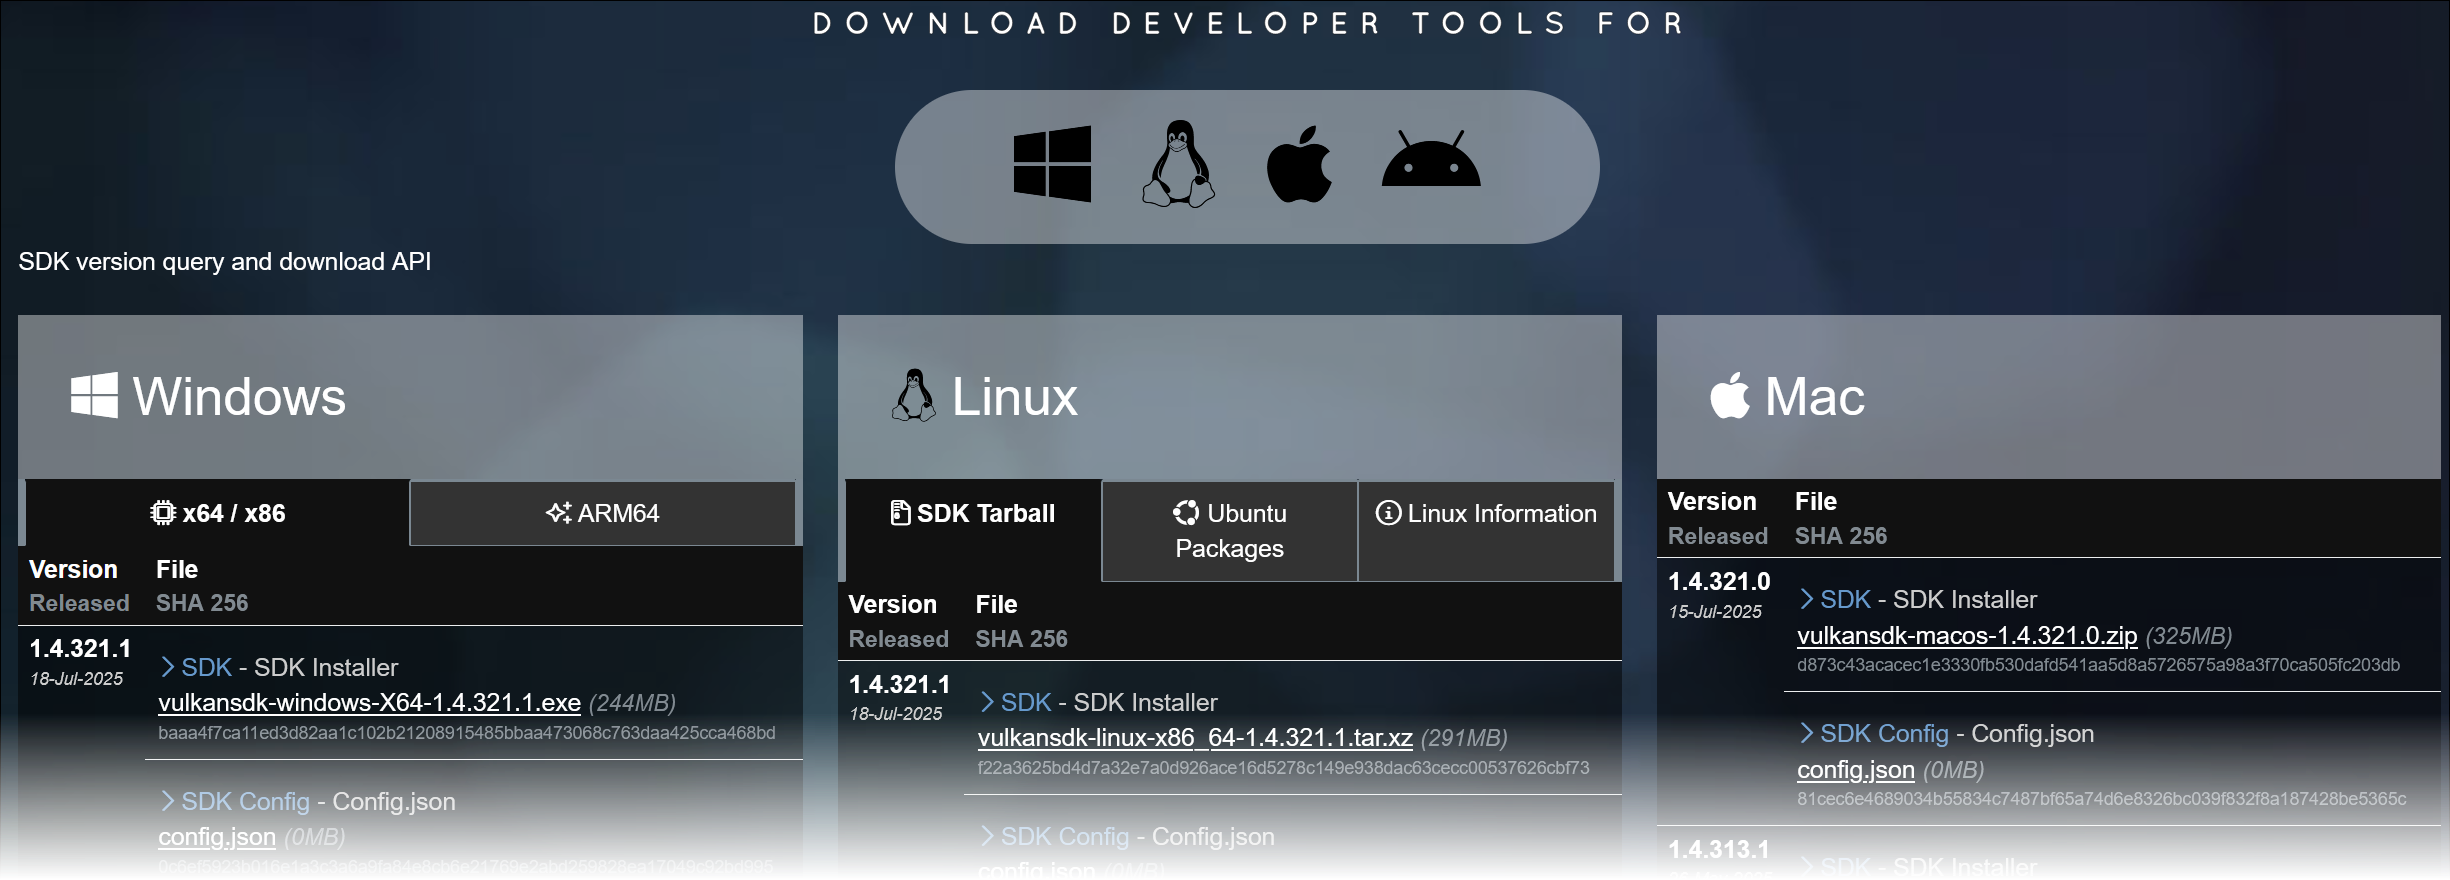
LunarG have made obtaining the SDK very easy. Visit their download page to install for the platform you need.
LunarG Vulkan SDK download page
Apex on Windows
Ensure Vulkan is installed before following these instructions. Vulkan adds an environment variable for the path to the SDK (for example, VULKAN_SDK=C:\VulkanSDK\1.3.283.0) so that the Vulkan libraries can be linked. The NuGet packages are configured with this setting, so to simplify this example, I’m using one of the Apex NuGet packages. Refer to this page to learn more about the Mako NuGet packages and how to use them.
We’ll use Visual Studio for this example, although the same approach will work equally well in Rider.
C++
Create a new C++ console project
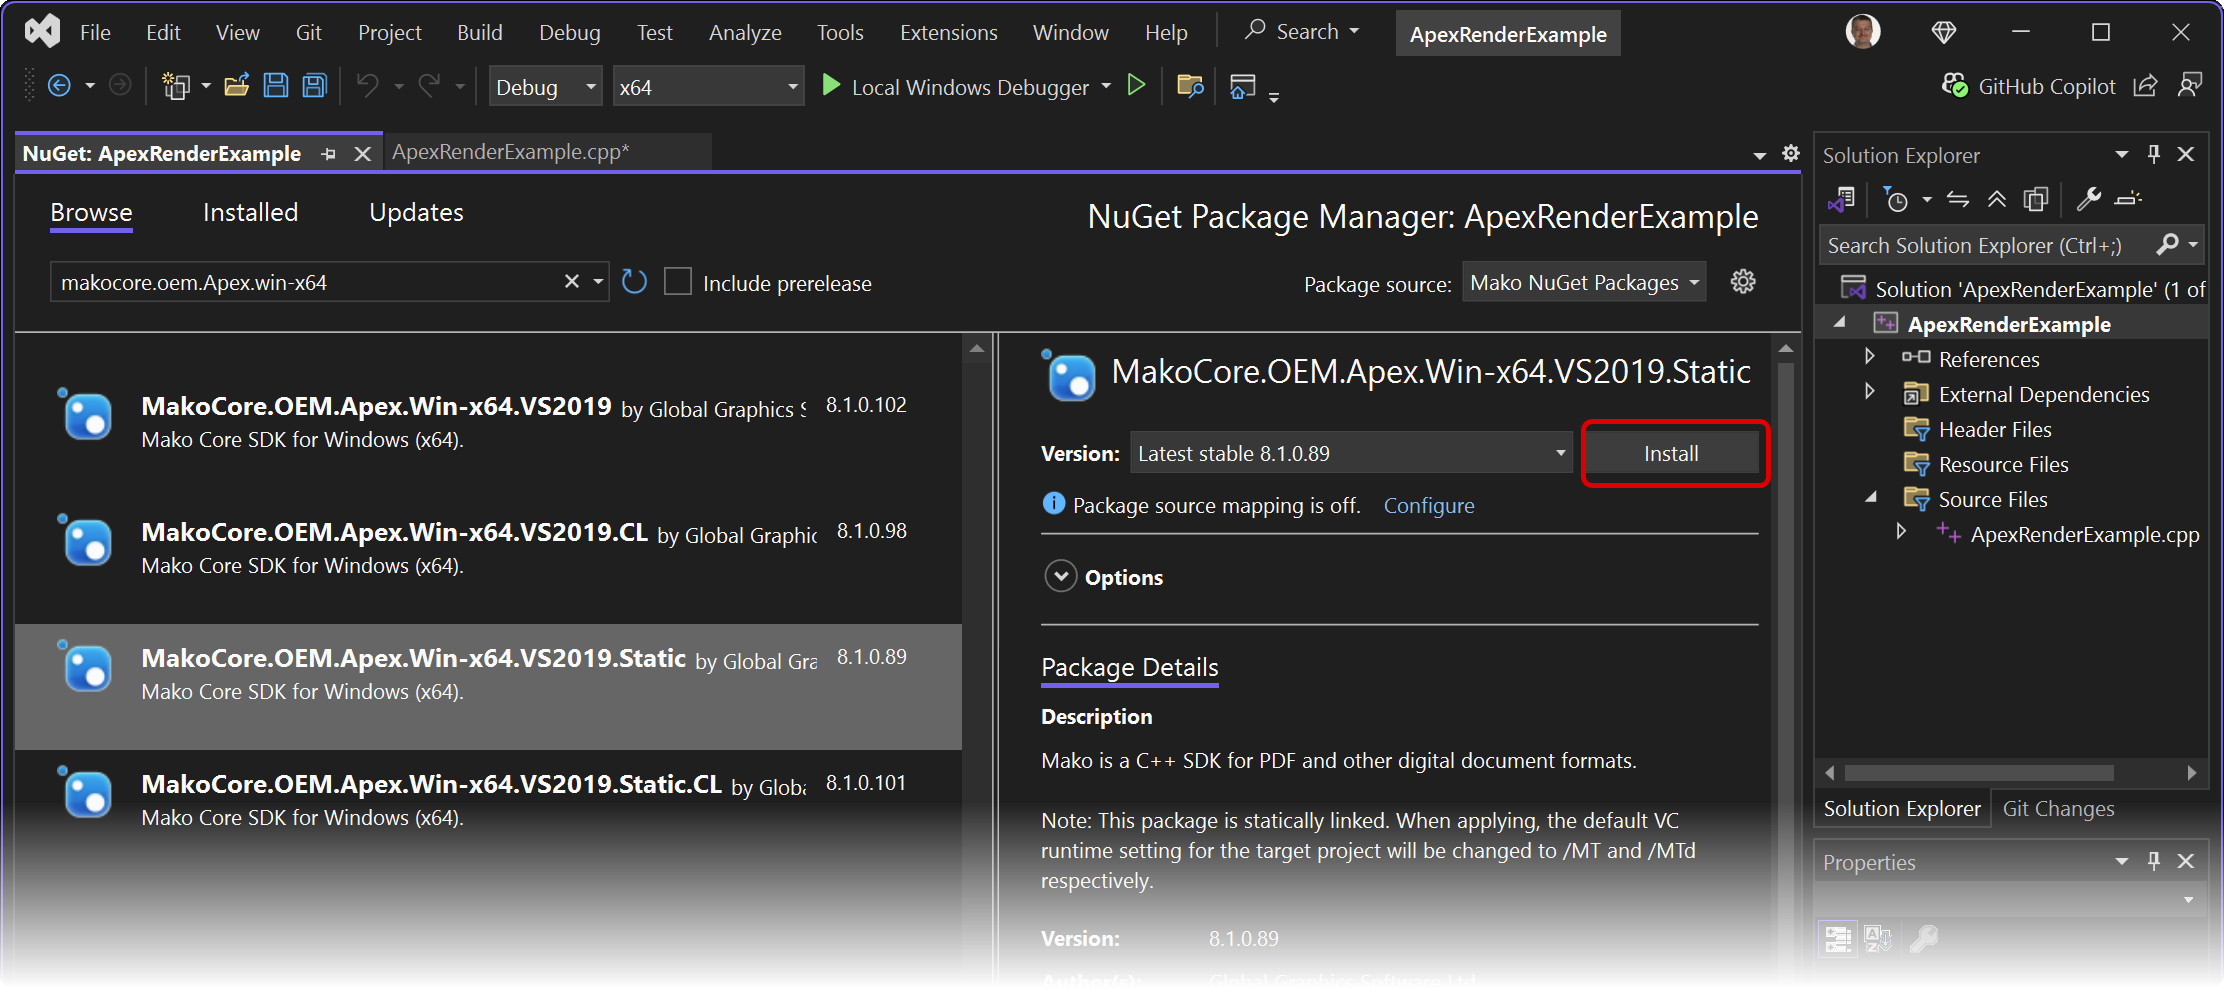
Add the NuGet package. Here I’m installing MakoCore.OEM.Apex.Win-x64.VS2019.Static.8.1.0.89.nupkg
Installing a NuGet package with the Manage NuGet Packages view
Double-click the source file. Delete any boilerplate that Visual Studio has added, then paste this code:
Click to expand
CPP
//
//  ApexRenderExample.cpp
//

#include <iostream>

#include <jawsmako/jawsmako.h>
#include <jawsmako/apexrenderer.h>

using namespace JawsMako;
using namespace EDL;

int main(int argc, const char* argv[])
{
    try
    {
        // Create our JawsMako instance.
        IJawsMakoPtr jawsMako = IJawsMako::create();
        IJawsMako::enableAllFeatures(jawsMako);

        U8String testFilePath = R"(C:\ggsource\Projects\CPP\ApexRenderExample\Testfiles\)";
        U8String resultFilePath = R"(C:\ggsource\Projects\CPP\ApexRenderExample\Results\)";

        // Open the document assembly, the first document, the first page and get the content thereof
        auto input = IInput::create(jawsMako, eFFPDF);
        auto assembly = input->open(testFilePath + "Cheshire Cat.pdf");
        auto document = assembly->getDocument();
        auto page = document->getPage(0);
        auto cropBox = page->getCropBox();
        auto content = page->getContent();

        // Let's render with Apex
        auto renderer = IApexRenderer::create(jawsMako);

        // First we need a renderspec, in this case to render to an IDOMImage
        auto imageRenderSpec = CImageRenderSpec();

        // We want a 300dpi result, so calculate the size in pixels
        imageRenderSpec.width = static_cast<uint32_t>(page->getWidth() / 96.0 * 300.0);
        imageRenderSpec.height = static_cast<uint32_t>(page->getHeight() / 96.0 * 300.0);

        // Specify the area to be rendered
        imageRenderSpec.sourceRect = cropBox;

        // And the color space
        imageRenderSpec.processSpace = IDOMColorSpaceDeviceRGB::create(jawsMako);

        // Now render
        renderer->render(content, &imageRenderSpec);

        // Fetch the result and encode in an image
        auto image = imageRenderSpec.result;
        IDOMPNGImage::encode(jawsMako, image, IOutputStream::createToFile(jawsMako, resultFilePath + "Cheshire Cat.png"));

        return 0;
    }
    catch (IError& e)
    {
        String errorFormatString = getEDLErrorString(e.getErrorCode());
        std::wcerr << L"Exception thrown: " << e.getErrorDescription(errorFormatString) << std::endl;
        return 1;
    }
    catch (std::exception& e)
    {
        std::wcerr << L"std::exception thrown: " << e.what() << std::endl;
        return 1;
    }
}
Adjust the paths (lines 21-22) and the filenames (lines 26 & 53) to suit
Build and run
C#
Create a new C# console project
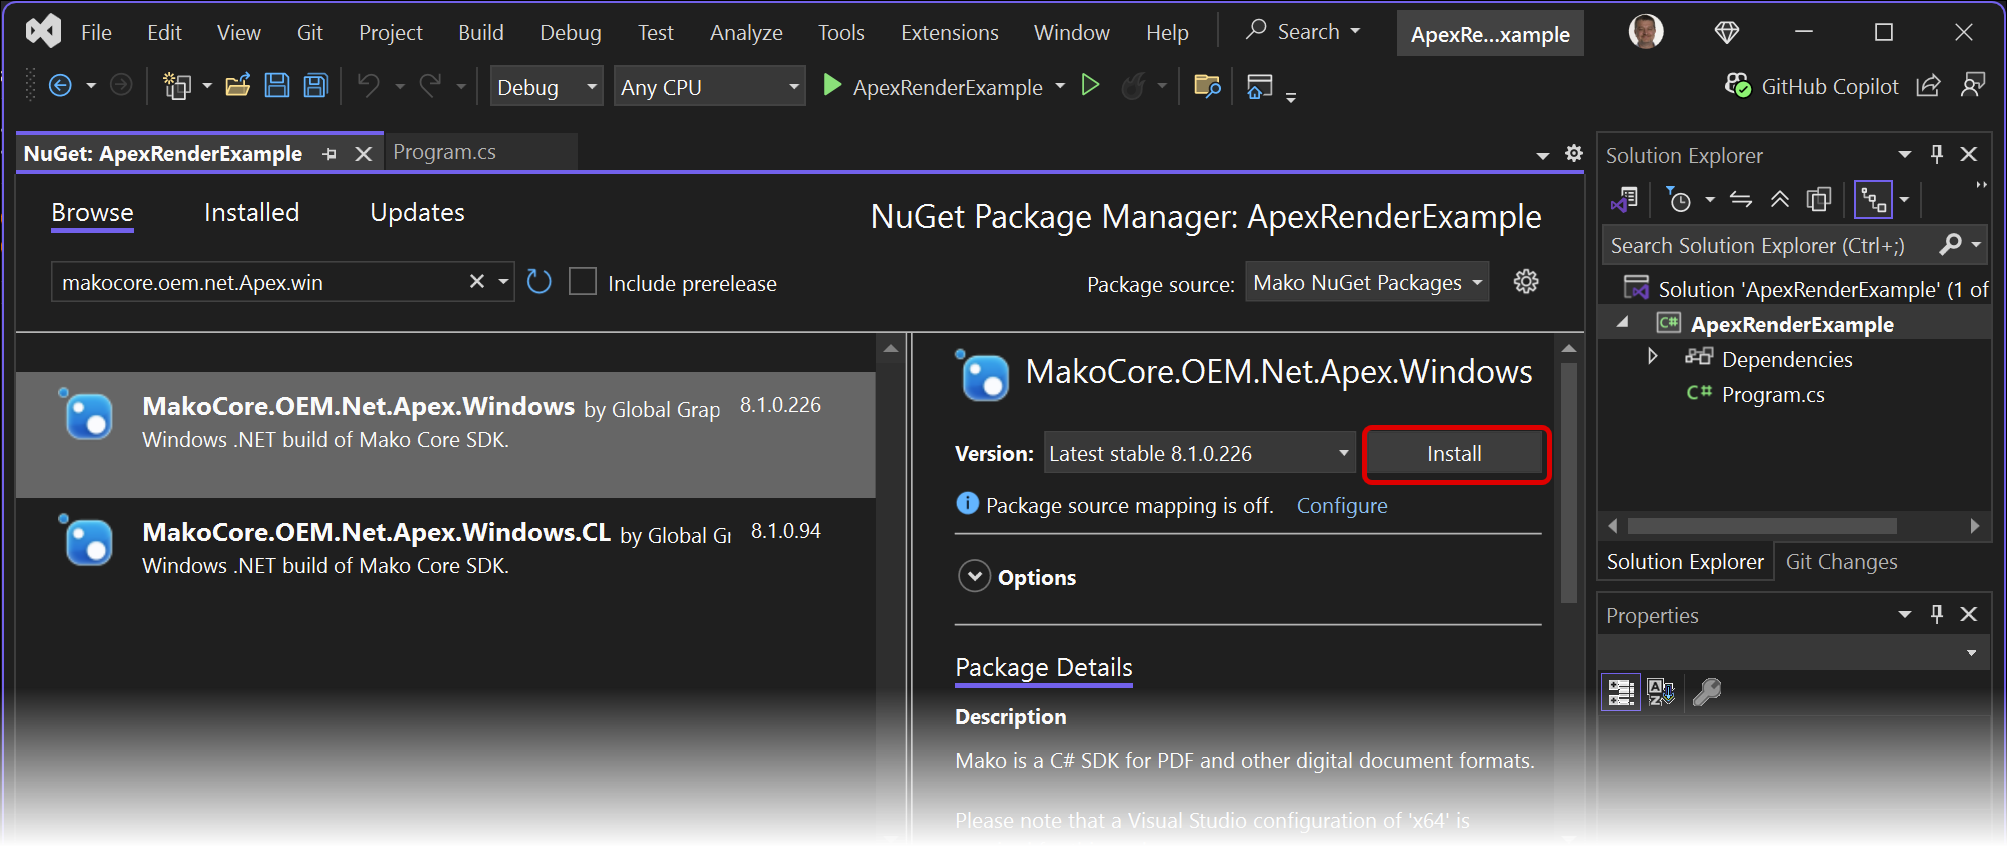
Add the NuGet package. Here I’m installing MakoCore.OEM.Net.Apex.Windows.nupkg
Installing the Mako NuGet package for C#
Open the source file (Program.cs). Delete any boilerplate that Visual Studio has added, then paste this code:
Click to expand
C#
//
//  ApexRenderExample
//
//  Program.cs
//

using JawsMako;

namespace ApexRenderExample;

internal class Program
{
    static int Main(string[] args)
    {
        try
        {
            var testFilePath = @"C:\ggsource\Projects\CS\ApexRenderExample\Testfiles\";
            var resultFilePath = @"C:\ggsource\Projects\CS\ApexRenderExample\Results\";

            var mako = IJawsMako.create();
            IJawsMako.enableAllFeatures(mako);

            // Open the document assembly, the first document, the first page and get the content thereof
            var input = IInput.create(mako, eFileFormat.eFFPDF);
            var assembly = input.open(testFilePath + "Cheshire Cat.pdf");
            var document = assembly.getDocument();
            var page = document.getPage();
            var cropBox = page.getCropBox();
            var content = page.getContent();

            // Let's render with Apex
            var renderer = IApexRenderer.create(mako);

            // First we need a renderspec, in this case to render to an IDOMImage
            var imageRenderSpec = new CImageRenderSpec();

            // We want a 300dpi result, so calculate the size in pixels
            imageRenderSpec.width = (uint)(page.getWidth() / 96.0 * 300.0);
            imageRenderSpec.height = (uint)(page.getHeight() / 96.0 * 300.0);

            // Specify the area to be rendered
            imageRenderSpec.sourceRect = cropBox;

            // And the color space
            imageRenderSpec.processSpace = IDOMColorSpaceDeviceRGB.create(mako);

            // Now render
            renderer.render(content, imageRenderSpec);

            // Fetch the result and encode in an image
            var image = imageRenderSpec.result;
            IDOMPNGImage.encode(mako, image, IOutputStream.createToFile(mako, resultFilePath + "Cheshire Cat.png"));
        }
        catch (MakoException e)
        {
            Console.WriteLine($"Exception thrown: {e.m_errorCode}: {e.m_msg}");
        }
        catch (Exception e)
        {
            Console.WriteLine($"Exception thrown: {e}");
        }

        return 0;
    }
}
Adjust the paths (lines 17-18) and the filenames (lines 25 & 52) to suit
Build and run
Apex on macOS
A reminder that the Vulkan SDK must be installed for these examples to build and run correctly.
C++
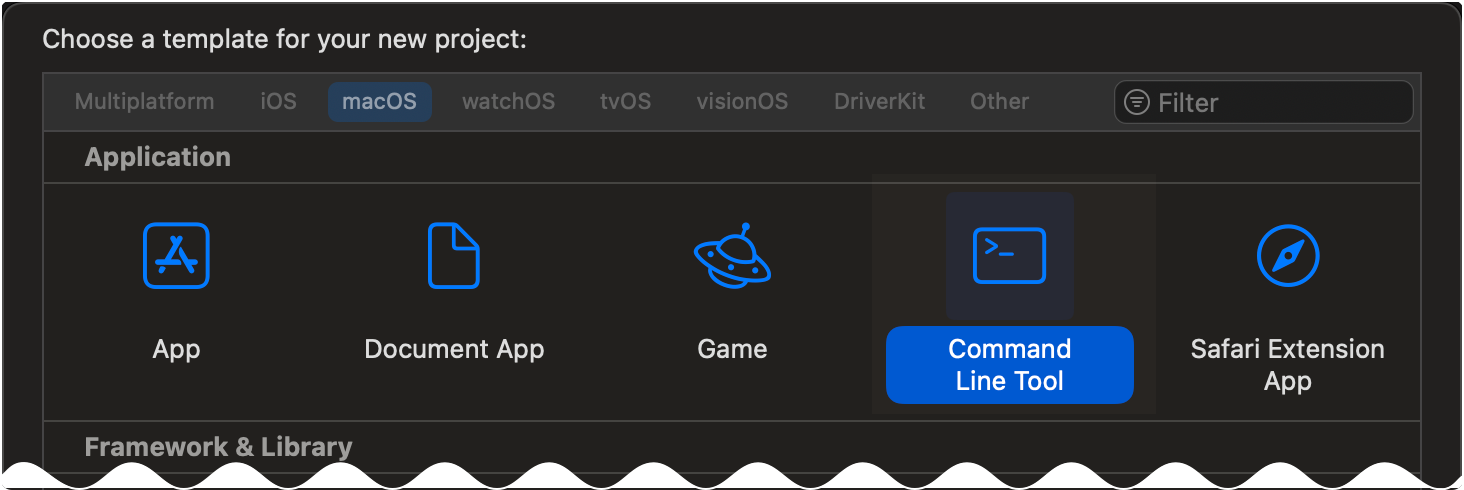
For this example, we’ll use XCode.
Begin by creating a new Command Line Tool
Xcode new project window
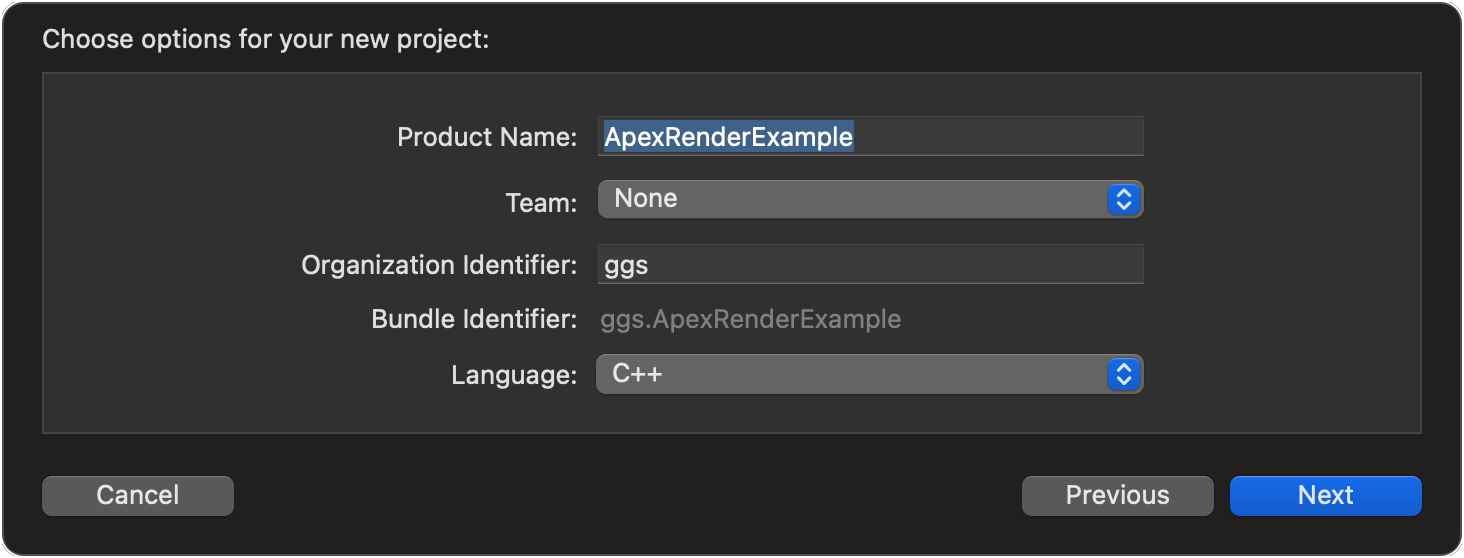
Set some options
Project options
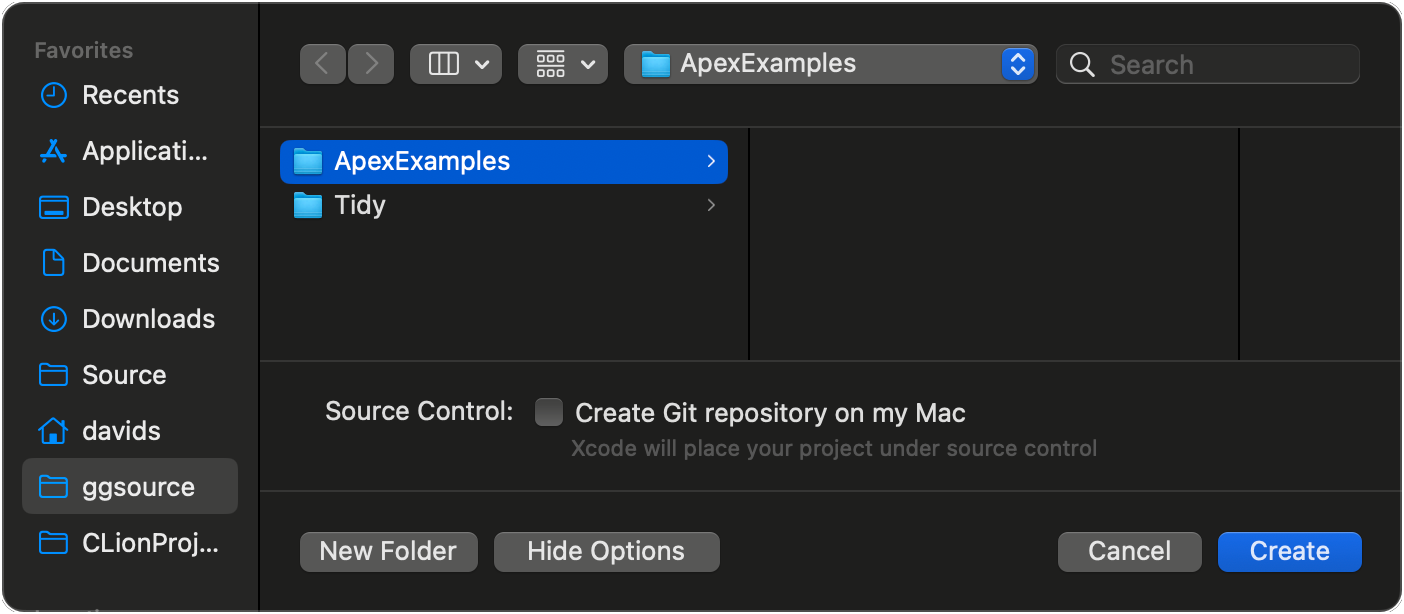
Decide where to save it
Save location
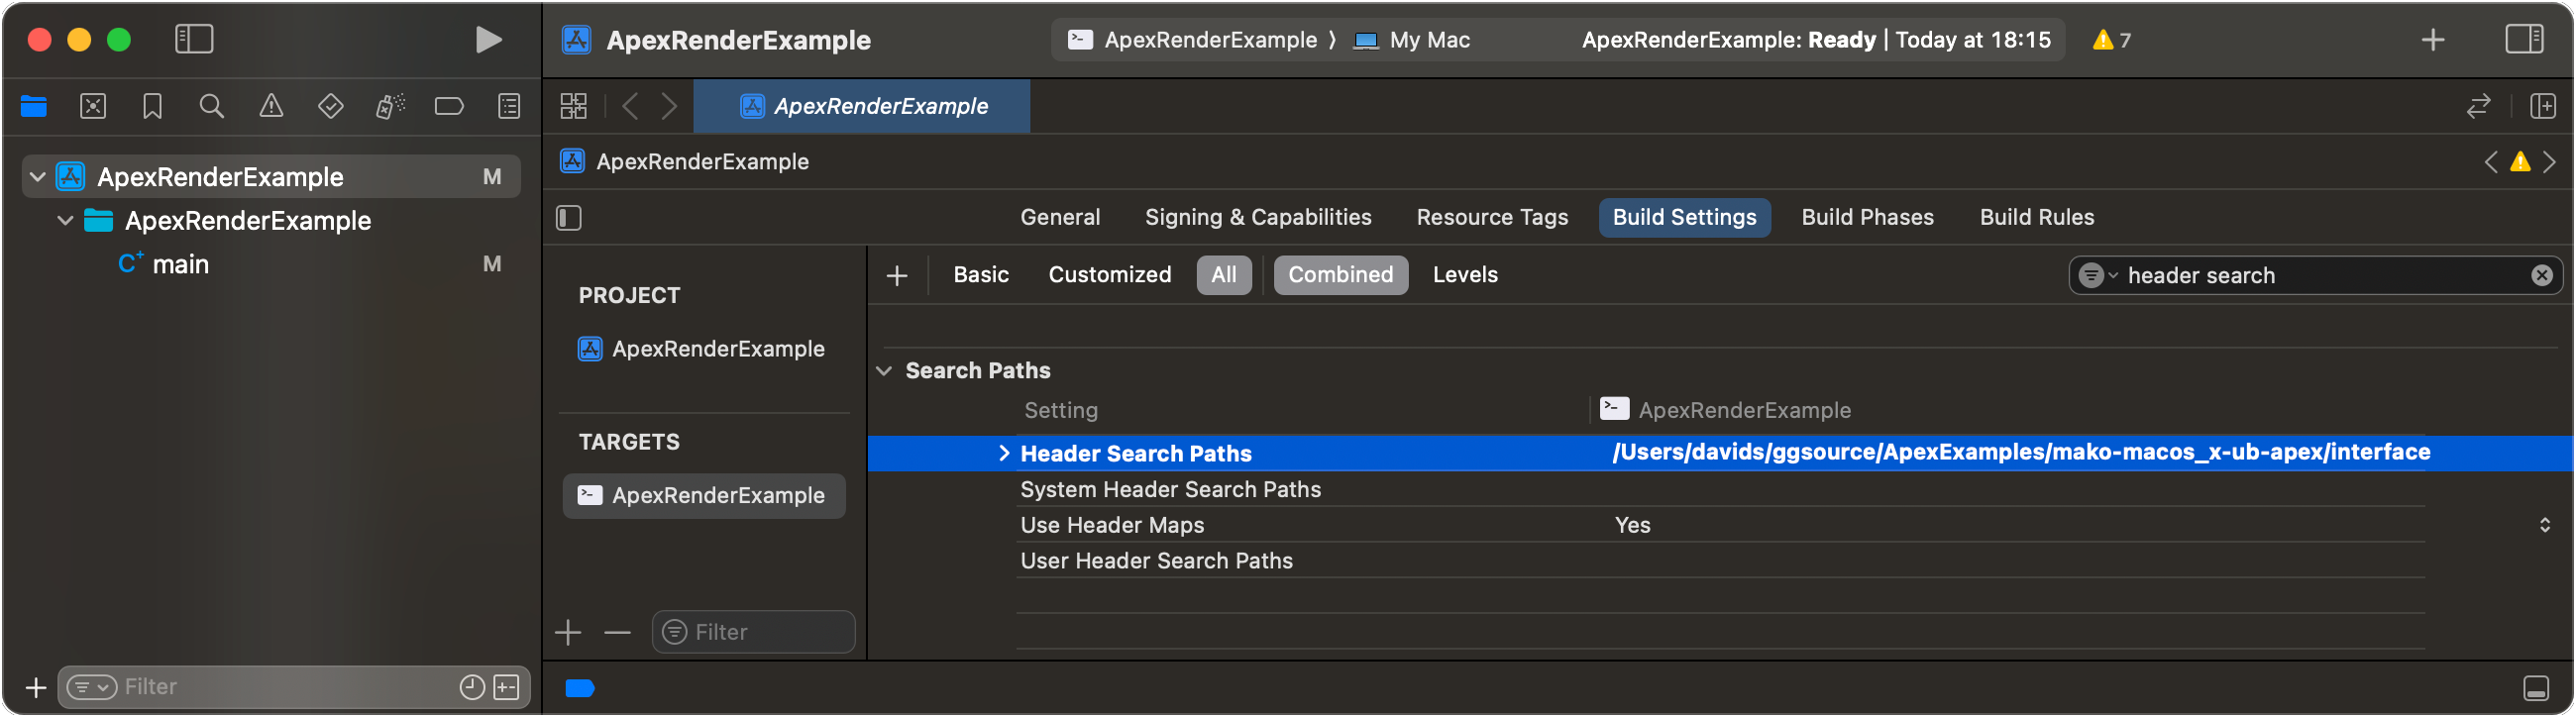
Next we need Mako. I’ve copied the folder from the macOS distribution folder found in MakoApexSDKto the parent folder, and we add the interface and libs paths to the project settings.
Path to headers (in Build Settings)
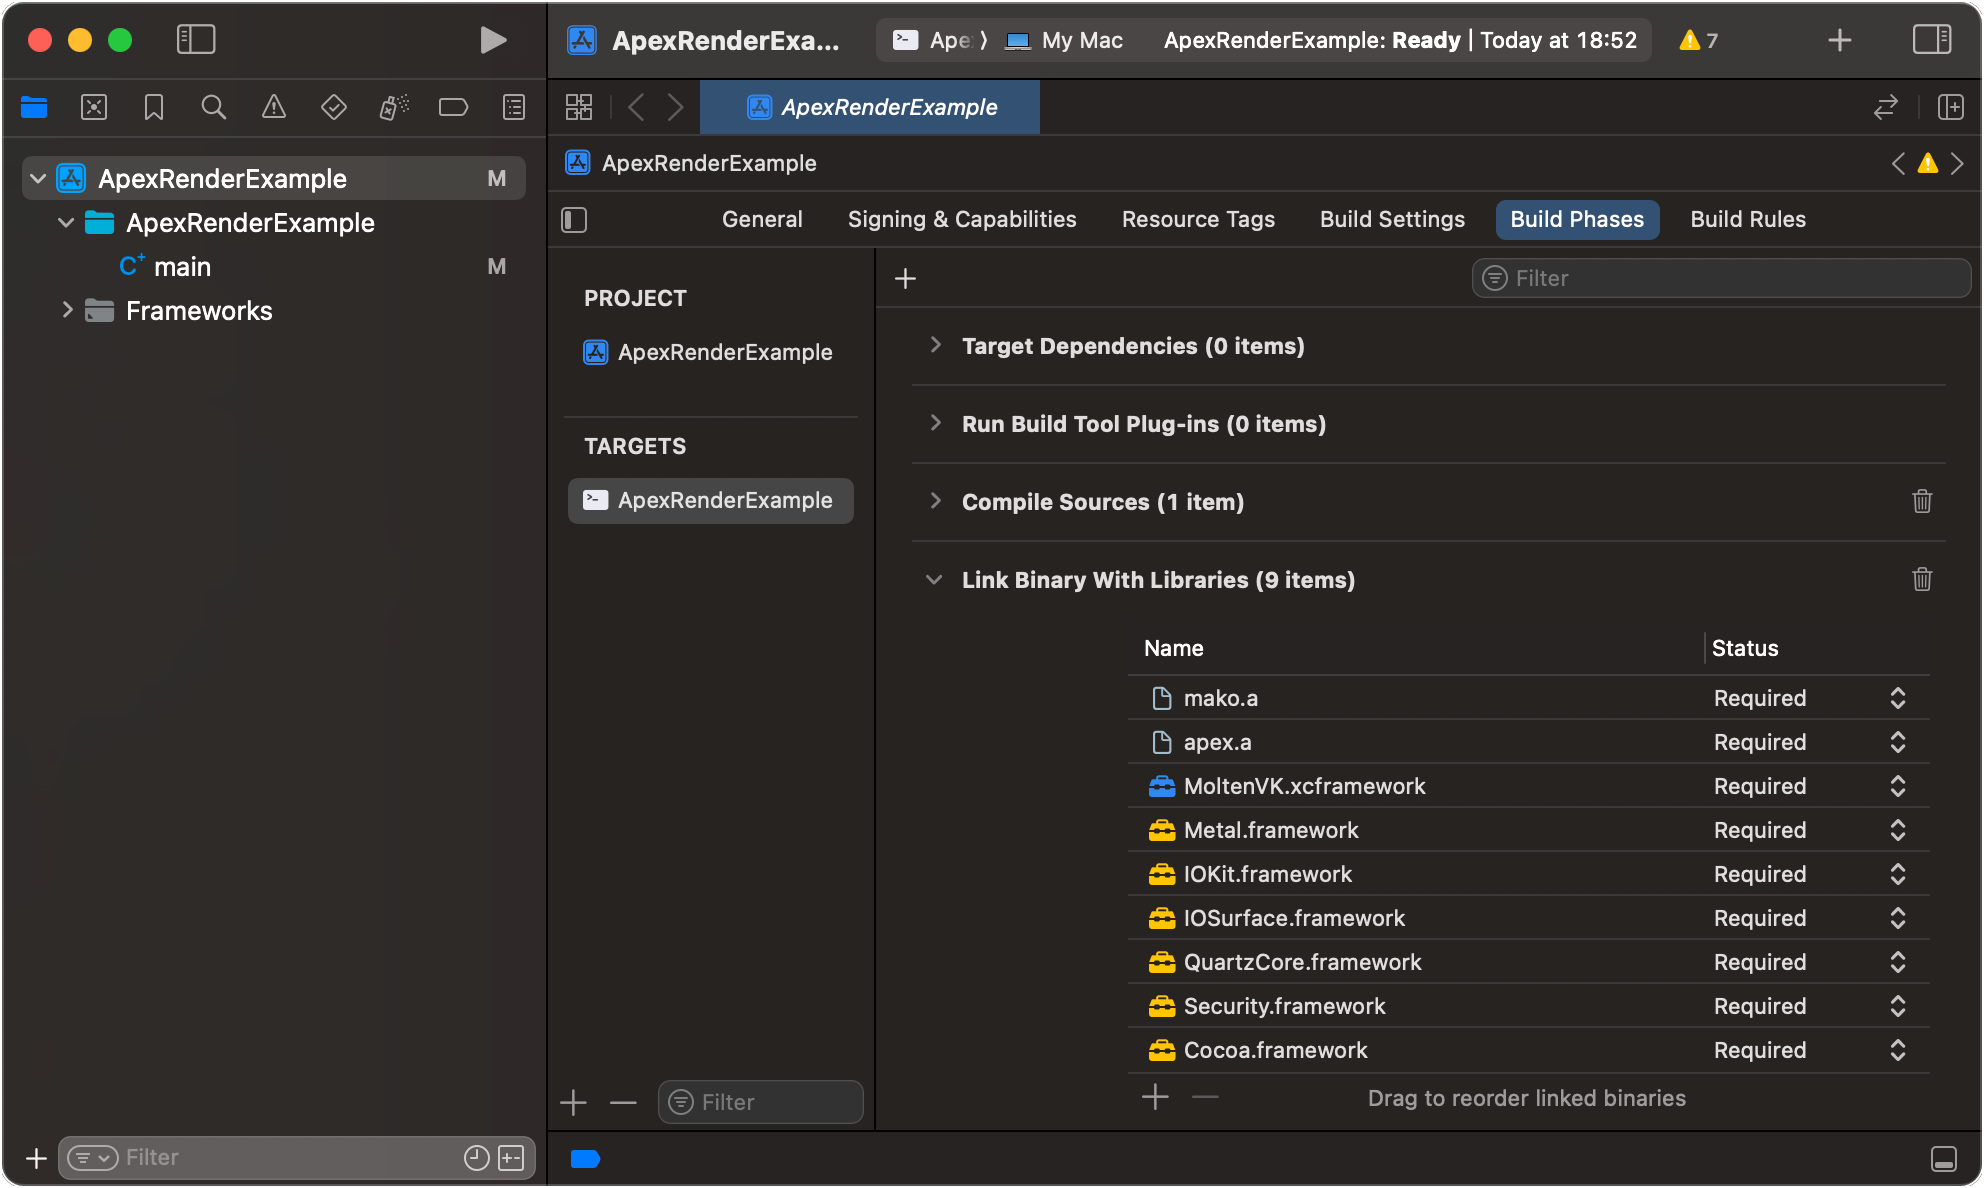
Besides Mako we need some standard application frameworks, plus Metal and MoltenVK.
Apple’s Metal is the low-level, high-performance graphics and compute API that offers developers near-direct access to the GPU for rendering and computation on Apple devices.
MoltenVK is the interface layer between Vulkan and Metal. It’s packaged with the Vulkan SDK.
Add these frameworks and libraries in the Build Phases tab
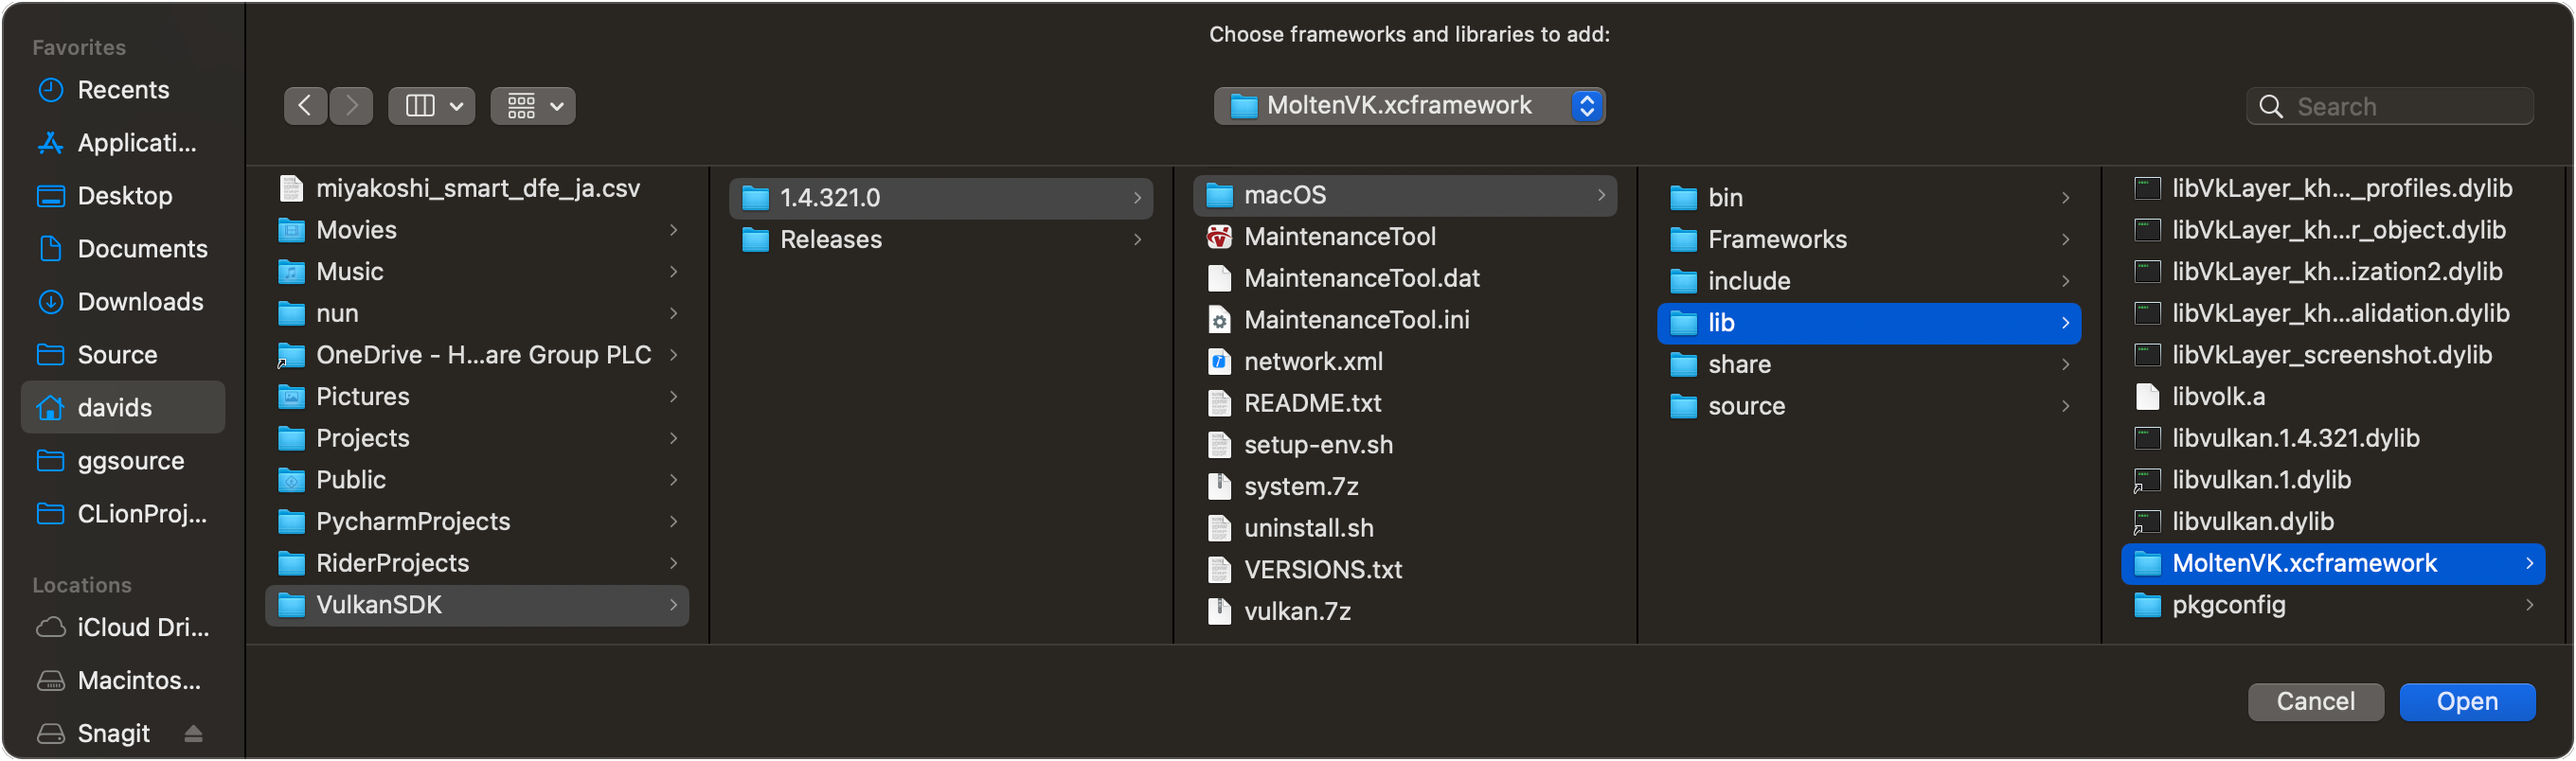
You can find the MoltenVK framework in the Vulkan SDK. Click Add other… in the Frameworks pane, then navigate to your installation of the Vulkan SDK.
Location of MoltenVK in the Vulkan SDK
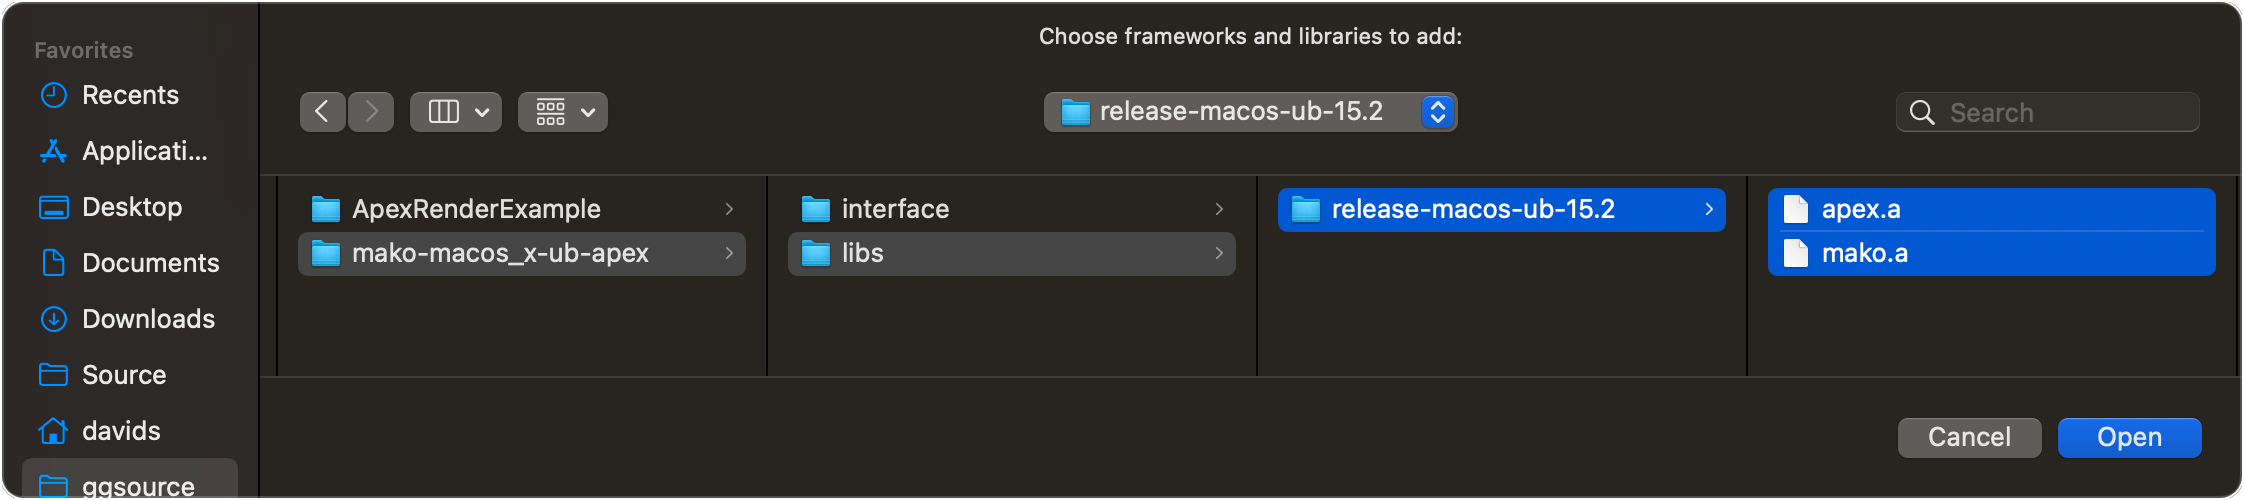
The libraries come from the Mako distribution folder. You need both mako.a and apex.a:
Mako libraries
Now we can write some code. Open main.cpp , remove any boilerplate that Xcode has added, then paste this code:
Click to expand
CPP
//
//  main.cpp
//  ApexRenderExample
//
//  Created by you on 31/07/2025.
//

#include <iostream>

#include <jawsmako/jawsmako.h>
#include <jawsmako/apexrenderer.h>

using namespace JawsMako;
using namespace EDL;

int main(int argc, const char * argv[])
{
    try
    {
        U8String testFilePath = "/Users/davids/ggsource/ApexExamples/TestFiles/";
        U8String resultFilePath = "/Users/davids/ggsource/ApexExamples/Results/";

        // Create our JawsMako instance.
        IJawsMakoPtr jawsMako = IJawsMako::create();
        IJawsMako::enableAllFeatures(jawsMako);

        // Open the adocument assembly, the first document, the first page and get the content thereof
        auto input = IInput::create(jawsMako, eFFPDF);
        auto assembly = input->open(testFilePath + "Cheshire Cat.pdf");
        auto document = assembly->getDocument();
        auto page = document->getPage(0);
        auto cropBox = page->getCropBox();
        auto content = page->getContent();

        // Let's render with Apex
        auto renderer = IApexRenderer::create(jawsMako);

        // First we need a renderspec, in this case to render to an IDOMImage
        auto imageRenderSpec = CImageRenderSpec();

        // We want a 300dpi result, so calculate the size in pixels
        imageRenderSpec.width = page->getWidth() / 96.0 * 300.0;
        imageRenderSpec.height = page->getHeight() / 96.0 * 300.0;

        imageRenderSpec.sourceRect = cropBox;
        imageRenderSpec.processSpace = IDOMColorSpaceDeviceRGB::create(jawsMako);

        // Now render
        renderer->render(content, &imageRenderSpec);

        // Fetch the result and encode in an image
        auto image = imageRenderSpec.result;
        IDOMPNGImage::encode(jawsMako, image, IOutputStream::createToFile(jawsMako, resultFilePath + "Cheshire Cat.png"));

        return 0;
    }
    catch (IError &e)
    {
        String errorFormatString = getEDLErrorString(e.getErrorCode());
        std::wcerr << L"Exception thrown: " << e.getErrorDescription(errorFormatString) << std::endl;
        return 1;
    }
    catch (std::exception &e)
    {
        std::wcerr << L"std::exception thrown: " << e.what() << std::endl;
        return 1;
    }

    return 0;
}
Adjust the paths (lines 20-21) and the filenames (lines 29 & 53) to suit
Build and run
C#
For C# I’ll use Rider. The MakoApexSDK SWIG/macOS_SWIG_(C#-Java-Python) contains a NuGet package that we can use.
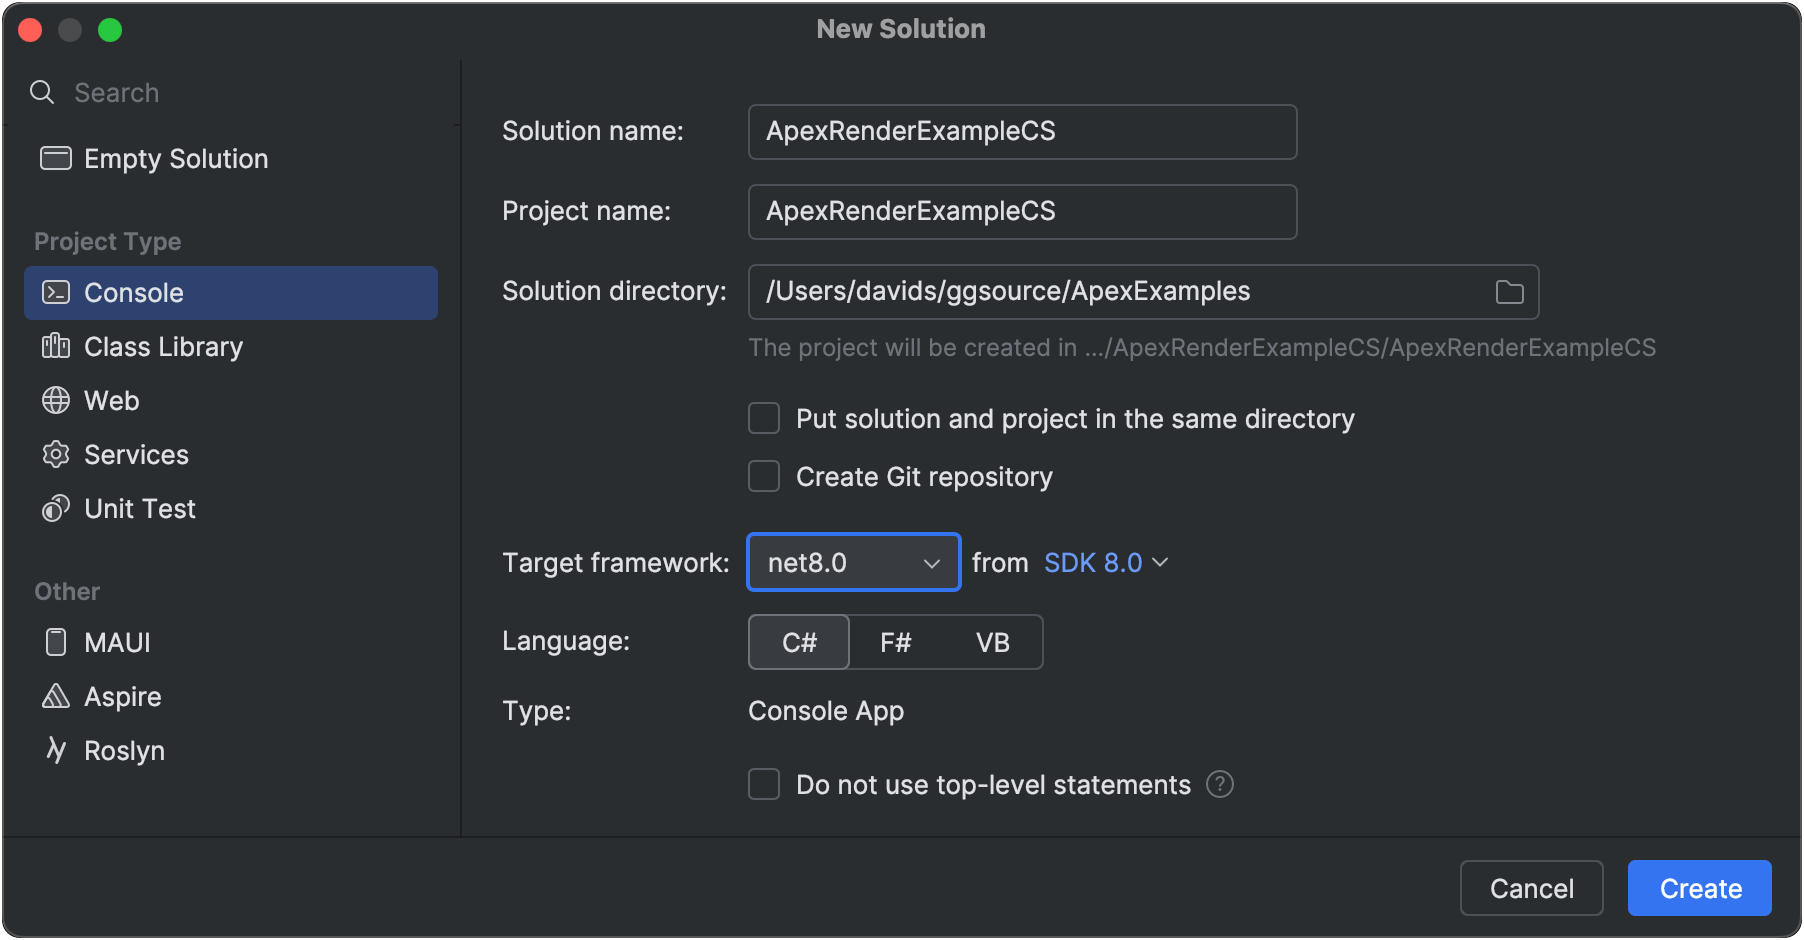
Create a new C# console project
Create a new Console project
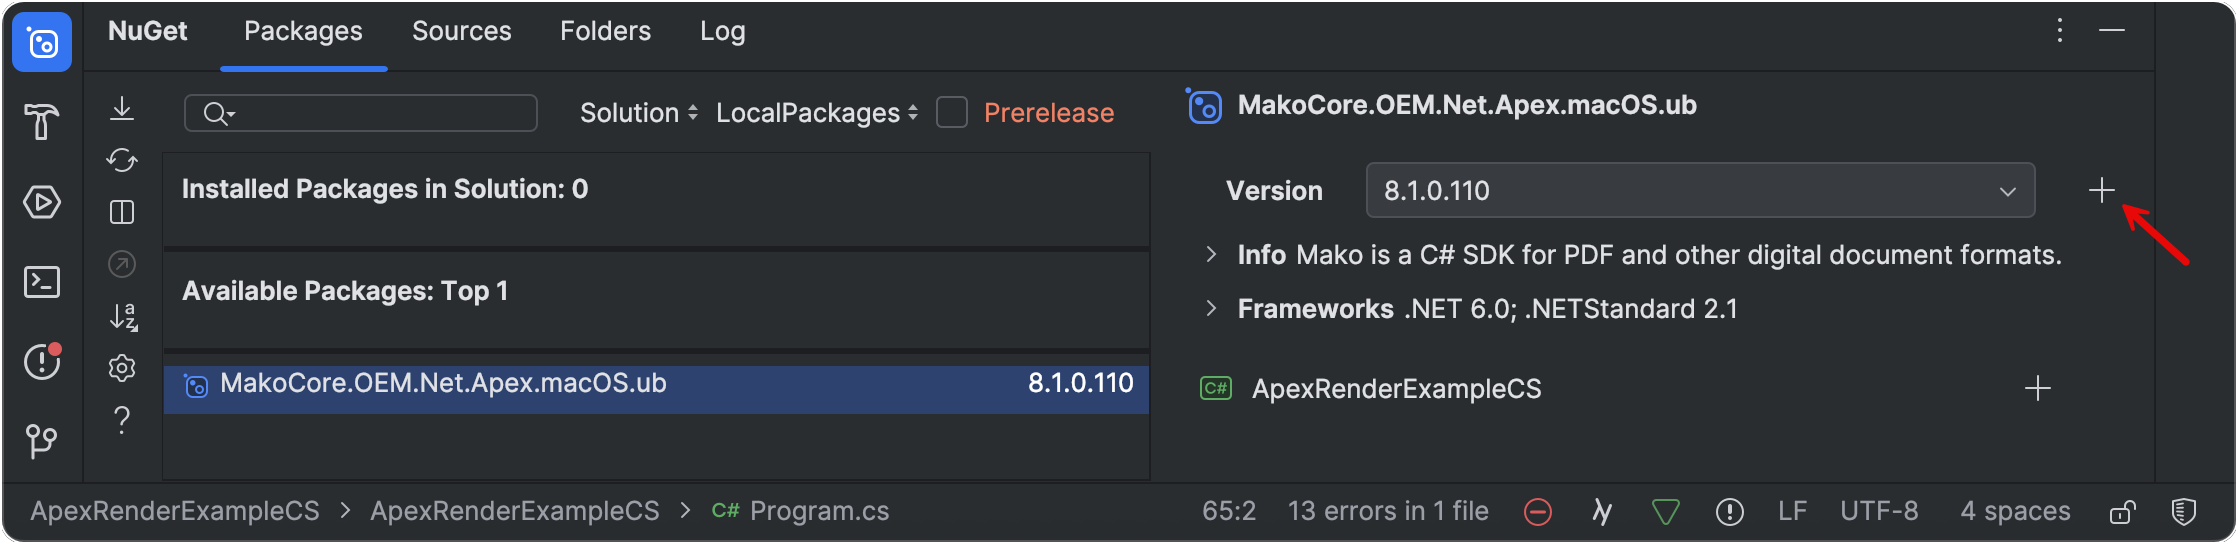
Add the NuGet package. See this page on how to work with NuGet packages from the Mako SDK if you are unfamiliar with them. Here I’m installing MakoCore.OEM.Net.Apex.macOS.ub.8.1.0.110.nupkg.
Click plus (arrowed) to initiate installation of the package.
Add some code. Open the source file (Program.cs). Delete any boilerplate that Rider has added, then paste this code:
Click to expand
C#
//
//  ApexRenderExample
//
//  Program.cs
//

using JawsMako;

namespace ApexRenderExampleCS;

internal class Program
{
    static int Main(string[] args)
    {
        try
        {
            const string testFilePath = "/Users/davids/ggsource/ApexExamples/TestFiles/";
            const string resultFilePath = "/Users/davids/ggsource/ApexExamples/Results/";

            var mako = IJawsMako.create();
            IJawsMako.enableAllFeatures(mako);

            // Open the document assembly, the first document, the first page and get the content thereof
            var input = IInput.create(mako, eFileFormat.eFFPDF);
            var assembly = input.open(testFilePath + "Cheshire Cat.pdf");
            var document = assembly.getDocument();
            var page = document.getPage();
            var cropBox = page.getCropBox();
            var content = page.getContent();

            // Let's render with Apex
            var renderer = IApexRenderer.create(mako);

            // First, we need a renderspec; in this case, to render to an IDOMImage
            var imageRenderSpec = new CImageRenderSpec();

            // We want a 300dpi result, so calculate the size in pixels
            imageRenderSpec.width = (uint)(page.getWidth() / 96.0 * 300.0);
            imageRenderSpec.height = (uint)(page.getHeight() / 96.0 * 300.0);

            // Specify the area to be rendered
            imageRenderSpec.sourceRect = cropBox;

            // And the color space
            imageRenderSpec.processSpace = IDOMColorSpaceDeviceRGB.create(mako);

            // Now render
            renderer.render(content, imageRenderSpec);

            // Fetch the result and encode in an image
            var image = imageRenderSpec.result;
            IDOMPNGImage.encode(mako, image, IOutputStream.createToFile(mako, resultFilePath + "Cheshire Cat.png"));
        }
        catch (MakoException e)
        {
            Console.WriteLine($"Exception thrown: {e.m_errorCode}: {e.m_msg}");
        }
        catch (Exception e)
        {
            Console.WriteLine($"Exception thrown: {e}");
        }

        return 0;
    }
}
Adjust the paths (lines 17-18) and the filenames (lines 25 & 52) to suit
Build and run
JavaScript errors detected
Please note, these errors can depend on your browser setup.
If this problem persists, please contact our support.