Getting started with Mako in Java
Getting started
Mako 6.0 adds language support for Java. As with C# and Python, it is made possible by the use of SWIG, a technology that connects the C++ of Mako with other languages.
Begin by extracting the Java libraries from the Mako distribution. Look for the Windows SWIG (C#, Java, Python) folder which contains a ZIP. Unzip this to retrieve the Java libraries from mako-SWIG\swig\java\release-win-x64-vc16\bindings.

Visual Studio Code
First:
Install Visual Studio Code if you haven't already. It can be found here.
Install a Java development kit (JDK) if you haven't already done so. You can download this from Oracle, although there are other JDKs available.
Install the Java extension in Visual Studio Code (VSCode). Get it from this Microsoft website (or just search for "VSCode Java" in your chosen search engine).
Copy the two Mako Java library files (jawsmakoIF.jar and jawsmakoIF_java.dll) to a new folder. It can be located anywhere, but it becomes your VSCode workspace, so you may wish to locate it in an appropriate place for use with your version control system.
Next, in VSCode, follow these steps:
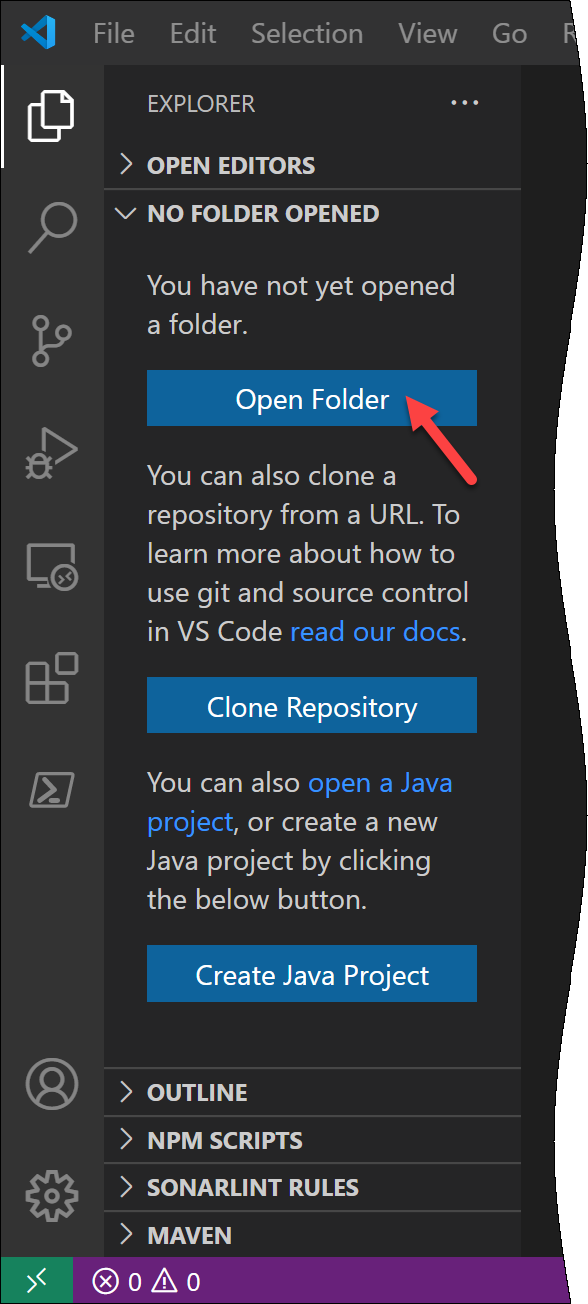 | 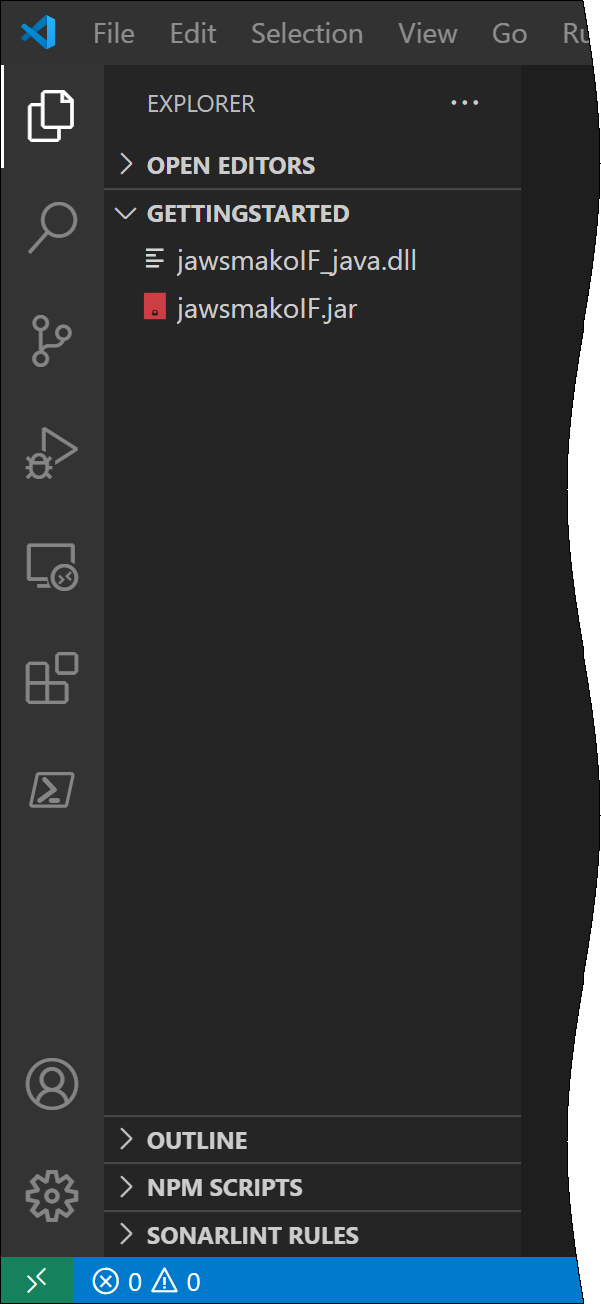 | 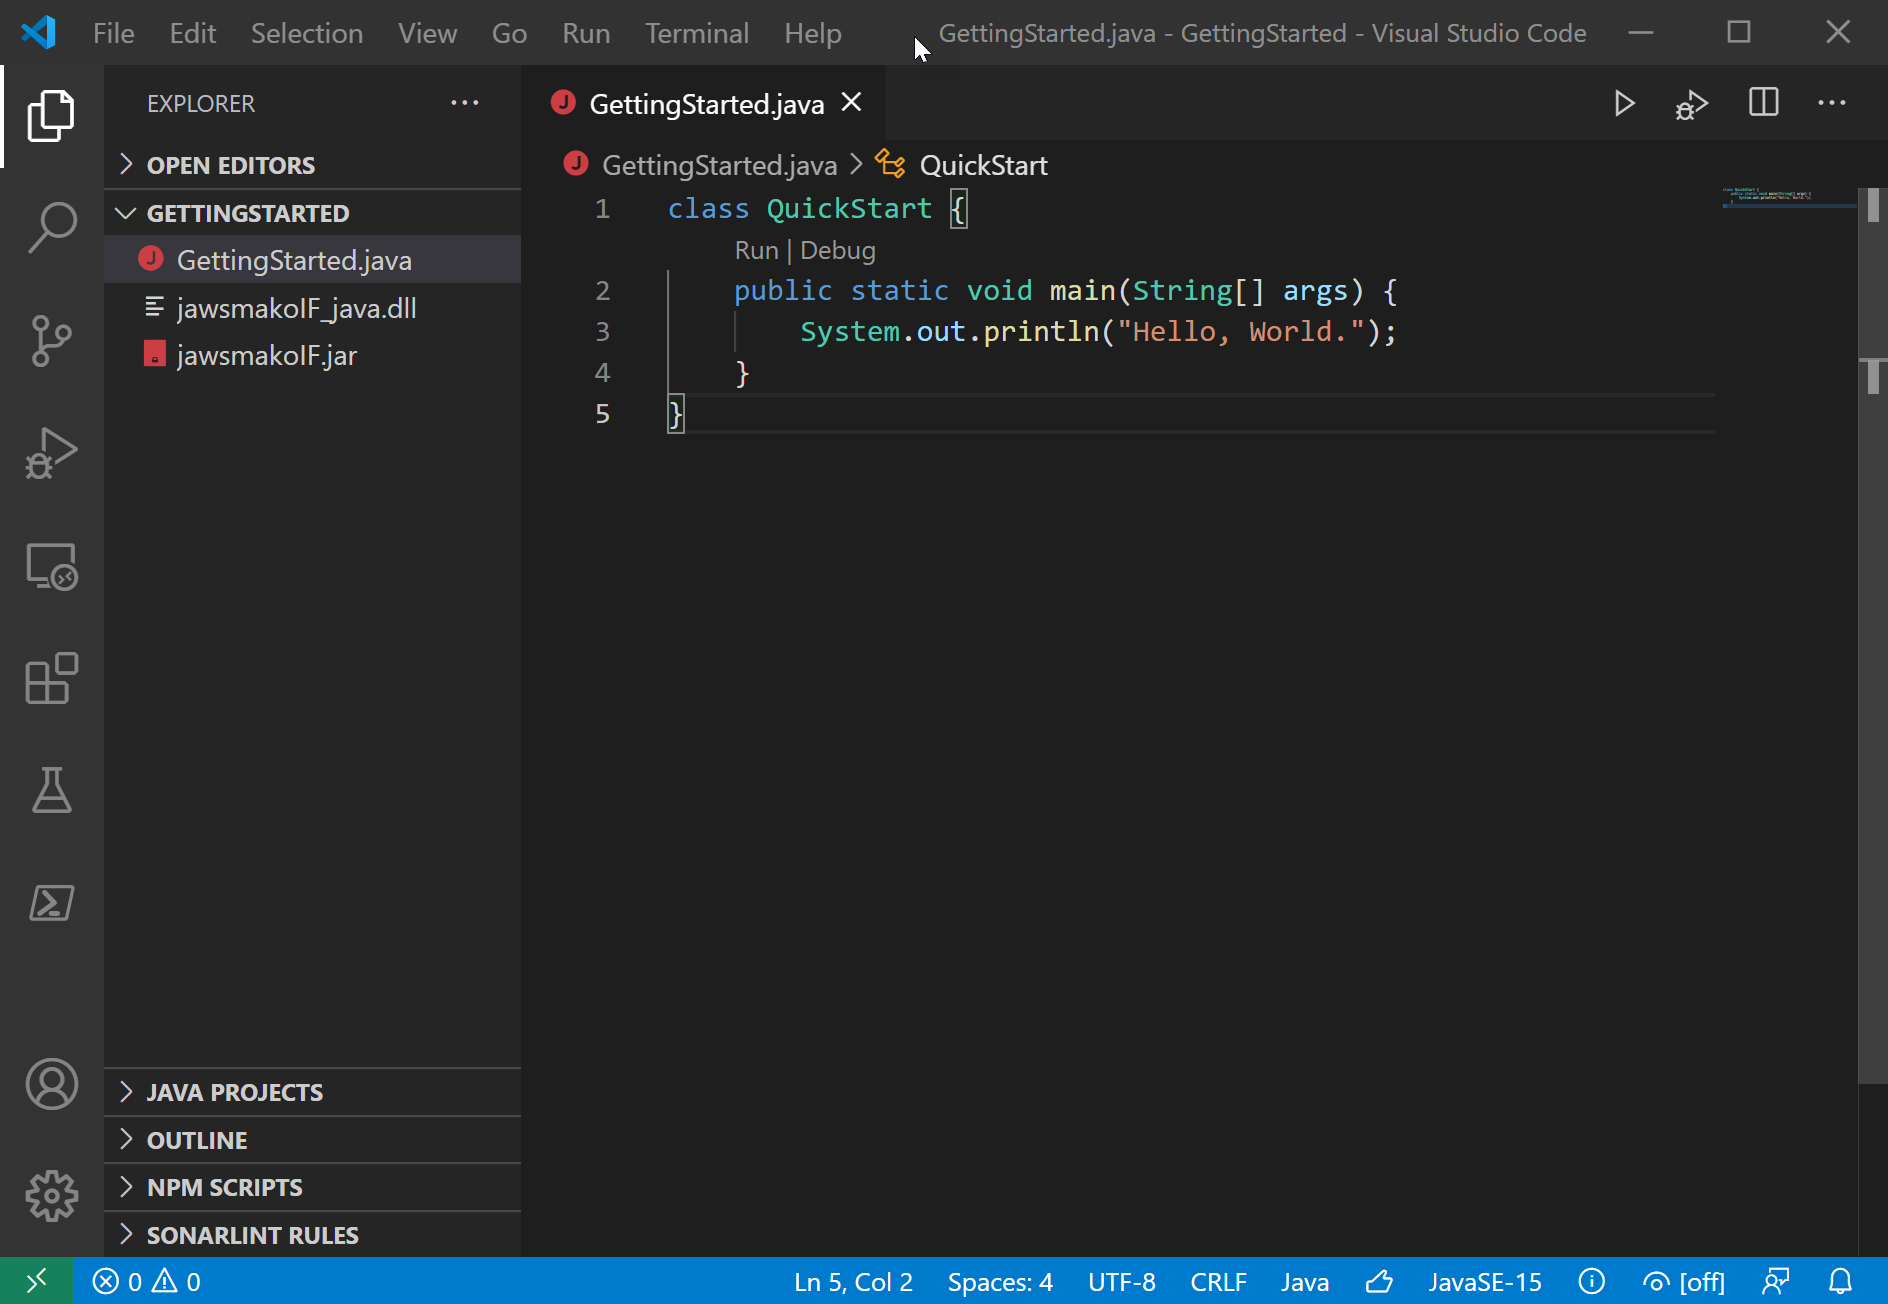 |
Open a folder. You can also use the Create Java Project, but for simplicity we'll use the Open Folder option. | The sidebar after opening the folder, which in this case is called GettingStarted | Now choose File>New File, and type the code you see here. You can copy and paste the code from the VSCode Java Getting Started guide – from View>Command Palette, choose Java: Getting Started to access it. |
Press F5 to make sure it runs. The output window at the bottom of the VSCode windows should display "Hello World".
The next step is to import the Mako library.
Add
import com.globalgraphics.JawsMako.jawsmakoIF.*;before the first line in your source.
This is underlined with an error squiggle indicating the reference cannot be resolved. To fix this, identify the .jar location to VSCode:
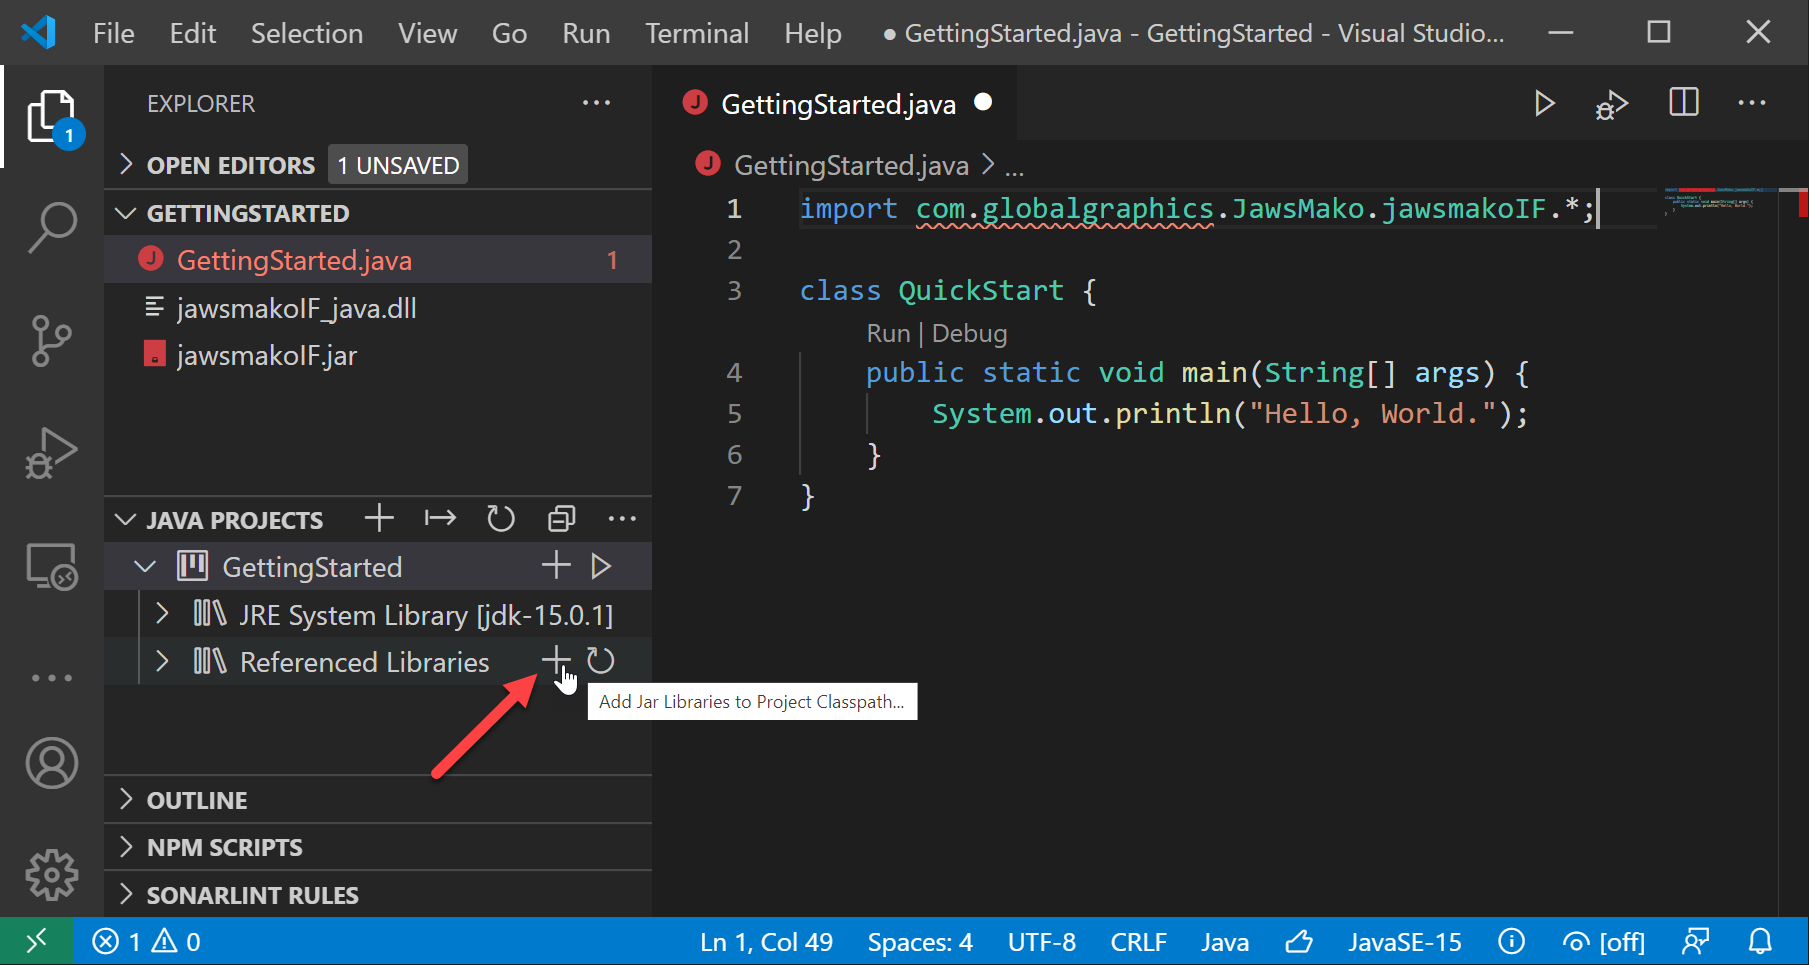 |
Open JAVA PROJECTS. Click the + next to Reference Libraries. Browse for |
Press F5 to make sure the project builds correctly.
Adding some Java code
You are now ready to add some code. Here is some Java code you can paste in, to replace what is there.
import com.globalgraphics.JawsMako.jawsmakoIF.*;

public class QuickStart {
    public static void main(String[] args) {

        var jawsMako = IJawsMako.create();
        var factory = jawsMako.getFactory();
        IJawsMako.enableAllFeatures(jawsMako);
        var assembly = IDocumentAssembly.create(jawsMako);
        var document = IDocument.create(jawsMako);
        assembly.appendDocument(document);
        var page = IPage.create(jawsMako);
        document.appendPage(page);

        // Create a fixed page A5 landscape.
        double pageWidth = 793.7;
        double pageHeight = 561.1;
        var fixedPage = IDOMFixedPage.create(factory, pageWidth, pageHeight);

        // Now create some DOM for the page contents.

        // Find a font
        long[] fontIndex = {0};
        IDOMFont font = jawsMako.findFont("Arial Bold", fontIndex);

        // Create a blue brush
        var colorSpace = IDOMColorSpacesRGB.create (factory);
        var colorValues = new StdVectFloat();
        colorValues.add(0.0f);
        colorValues.add(0.0f);
        colorValues.add(1.0f);

        var blueColor = IDOMColor.createFromVect(factory, colorSpace, 1.0f, colorValues);
        var solidBrush = IDOMSolidColorBrush.create(factory, blueColor);

        // Create glyphs
        String message = "Mako Java API";
        var glyphs = IDOMGlyphs.create(factory, message, 72, new FPoint(10, pageHeight / 2), solidBrush, font, fontIndex[0]);

        // And add to the page
        fixedPage.appendChild(glyphs.toIDOMNode());

        // Assign content to a page
        page.setContent(fixedPage);

        // Now we can write this to a PDF
        IPDFOutput.create(jawsMako).writeAssembly(assembly, "TestJava.pdf", IProgressTick.Null ());

        System.out.println("File created.");
    }
}
Run this code by pressing F5. You should see the message "File Created." in the output window. The output is in your project folder.
Apache NetBeans
First:
Install a Java development kit (JDK) if you haven't already done so. You can download this from Oracle, although there are other JDKs available.
Install Apache NetBeans, available here.
Start NetBeans and choose File>New Project:
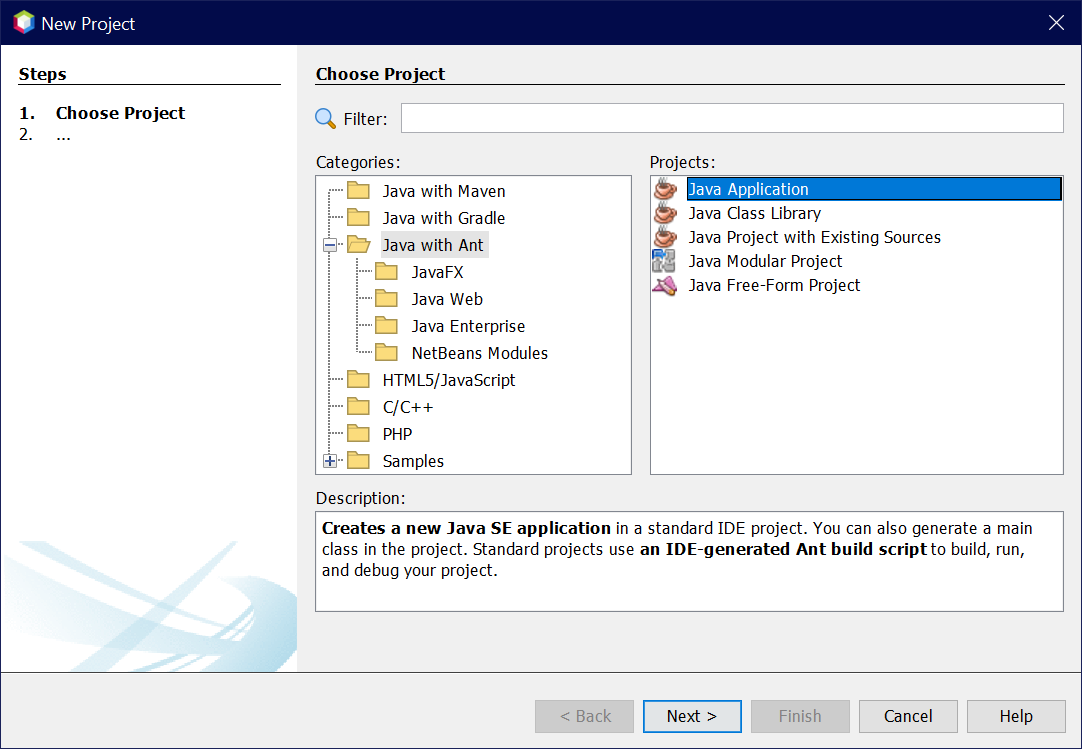
Choose "Java with Ant" and "Java Application".
Click "Next".
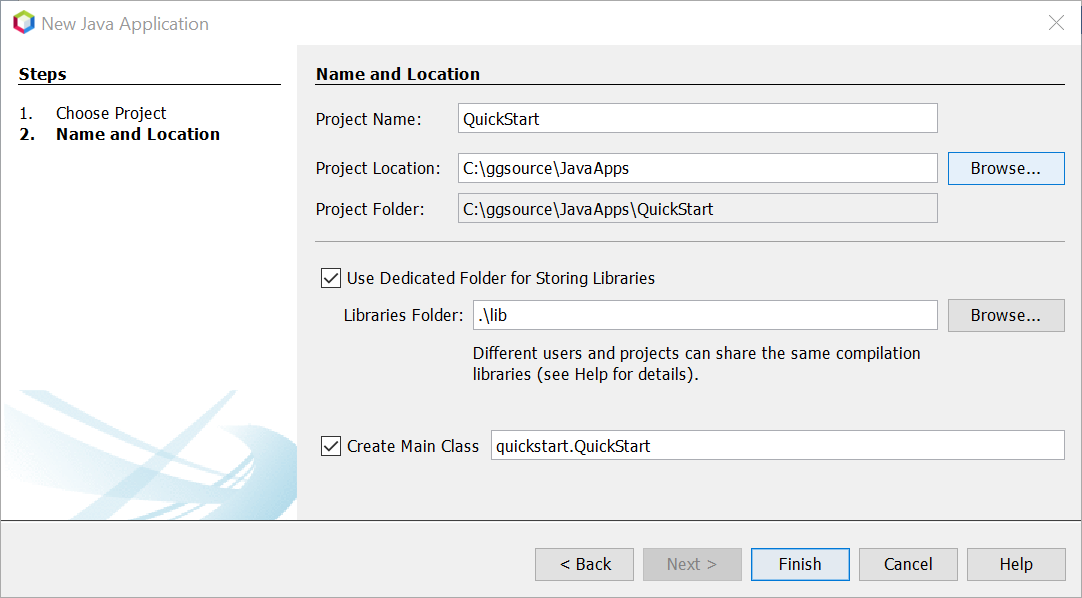
Enter a Project Name of "QuickStart". You can choose any name; however, "QuickStart" matches the sample code you can paste from this page.
Check "Use Dedicated Folder for Storing Libraries". This creates a lib folder named "lib" in your project folder.
Click "Finish".
The next step is to copy the Mako libraries into your project:
Copy the two Mako files (
jawsmakoIF.jarandjawsmakoIF_java.dll) to a new folder named "JawsMako".Copy or move the JawsMako folder into the lib folder.
Next import the libraries into your project:
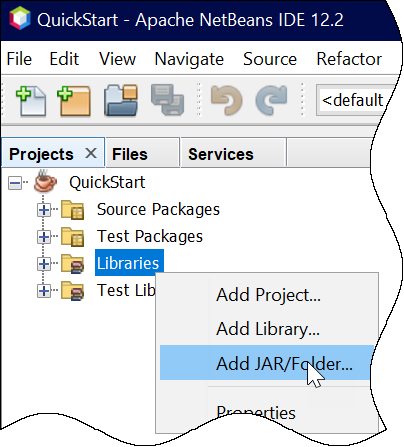 | 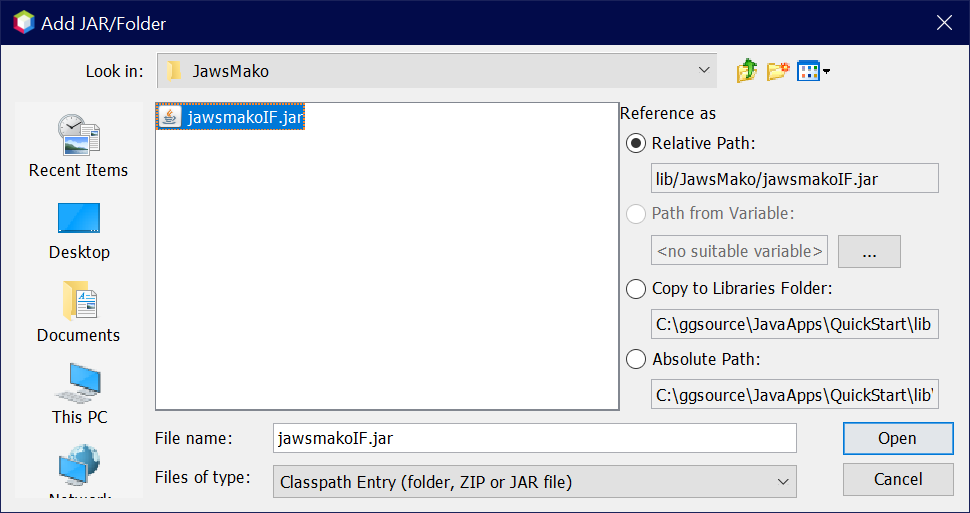 |
|
|
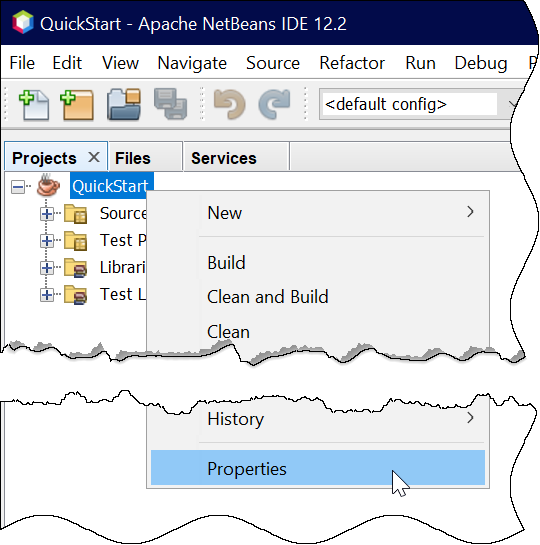
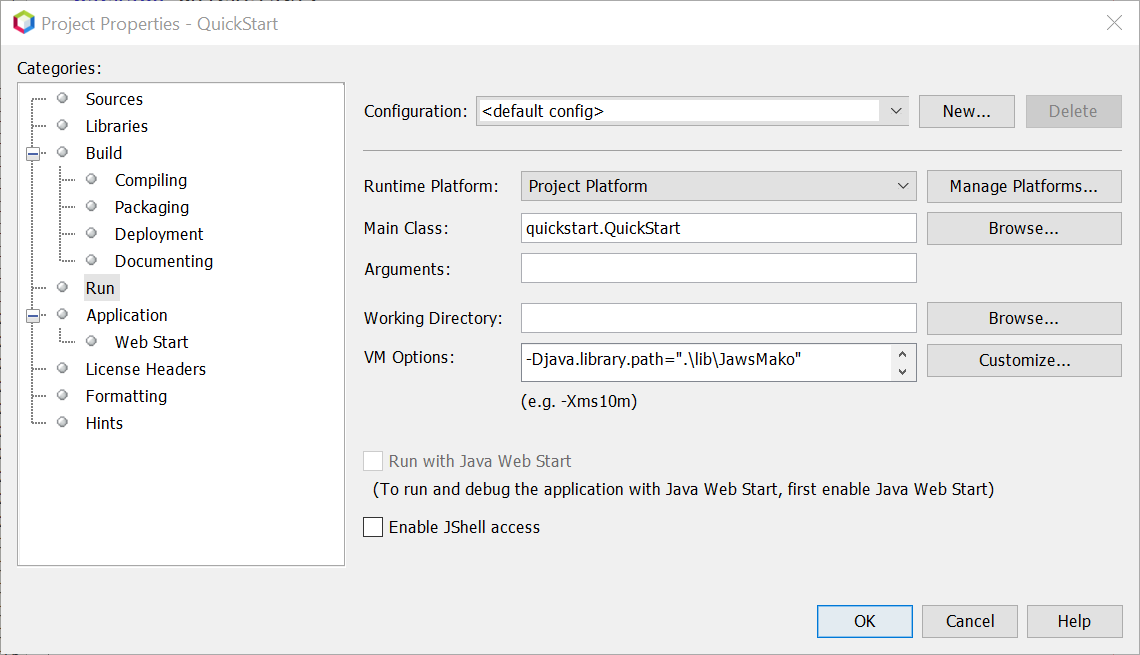
Finally let the Java runtime know the location of the Mako runtime, jawsmakoIF_java.dll. Do this in the project properties:
 |  |
|
|
Now add some code:
Add
import com.globalgraphics.JawsMako.jawsmakoIF.*;just belowpackage quickstart;Paste the entire QuickStart class from the code on this page, replacing the empty class added by NetBeans when you created the project.
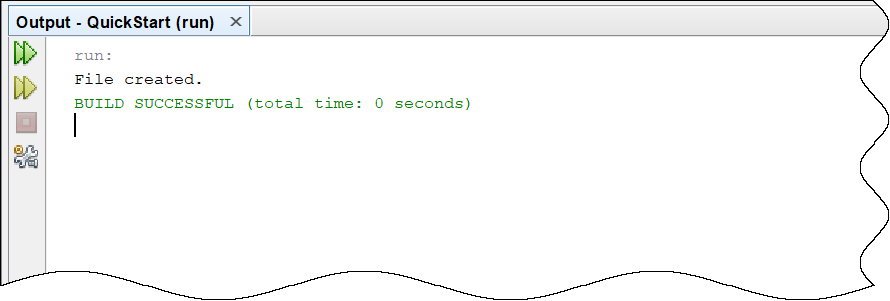
Press F6 to run this code. You should see the message "File Created." in the output window. The output is in your project folder.
IntelliJ IDEA
These are the steps for creating a command-line Java project in JetBrains IDE that can use the Mako SWIG build for Java.
Obtain the Java libraries from the SWIG build, for the required platform
They are found in thse locations.
Platform | Distribution folder path | File(s) |
|---|---|---|
Windows |
|
|
macOS |
|
|
Linux |
|
|
There are some additional builds for different flavors of Linux, e.g. Ubuntu, Centos8.
Creating a command-line application
Follow these steps:
Open IntelliJ
Choose File> New> Project
Choose Java
Choose SDK (11 or later)
Click Next
On the next pane:
Leave Create Project From Template unchecked
Click Next
On the next pane:
Give your project a name and decide where to save it
Leave other settings at their default
Click Finish.
To add Mako
Locate your project folder, then add a folder at the same level as
srccalledbindings.Copy the
jawsMakoIF.jarand library (e.g.,libjawsmakoIF_java.so) to this folder.Right-click the
jawsMakoIF.jarfile in the sidebar, then choose "Add as library".
You can also reach this setting via File> Project Structure:
Select Libraries under Project Settings
Click + to add, then navigate to the folder containing
jawsMakoIF.jarand select it.
Get coding!
Right-click the
srcfolder and choose New> Java Class.Paste this code to get started.
import com.globalgraphics.JawsMako.jawsmakoIF.*;

public class MakoTest {
   public static void main(String[] args) {
       var mako = IJawsMako.create();
       IJawsMako.enableAllFeatures(mako);
       IEDLClassFactory factory = mako.getFactory();
   }
}