
Working with the Apex sample apps
Introduction
We have created sample apps that enable you to experiment with the Apex technology without having to write any code.
ApexTiledViewer- this is a desktop app that lets you judge Apex performance for yourself, offering a quick and easy way to compare it to Mako’s Jaws renderer.simpleapexrender- a command-line app that will render a PDF to bitmap(s), one per page. It offers many controls over how the output is produced.
ApexTiledViewer
The ApexTiledViewer is available for Windows and macOS. Watch this YouTube video to see it in action.
https://www.youtube.com/watch?v=nIiuUsuU8RsGetting ready to run ApexTiledViewer on Windows
You will need these three files, obtained by unzipping apextileddemo.zip.
ApexTiledViewer.exewxbase325u_vc_x64_custom.dllwxmsw325u_core_vc_x64_custom.dll
The last two files that are runtimes for wxWidgets, the windowing software that the application uses, must be in the same folder as the executable.
Providing the graphics card driver is installed (this is usually automatic on Windows), Apex needs nothing else.
Running the application
When you run the executable, you will be presented with a file picker to choose the PDF you would like to work with. Select a file, and the application window will open.
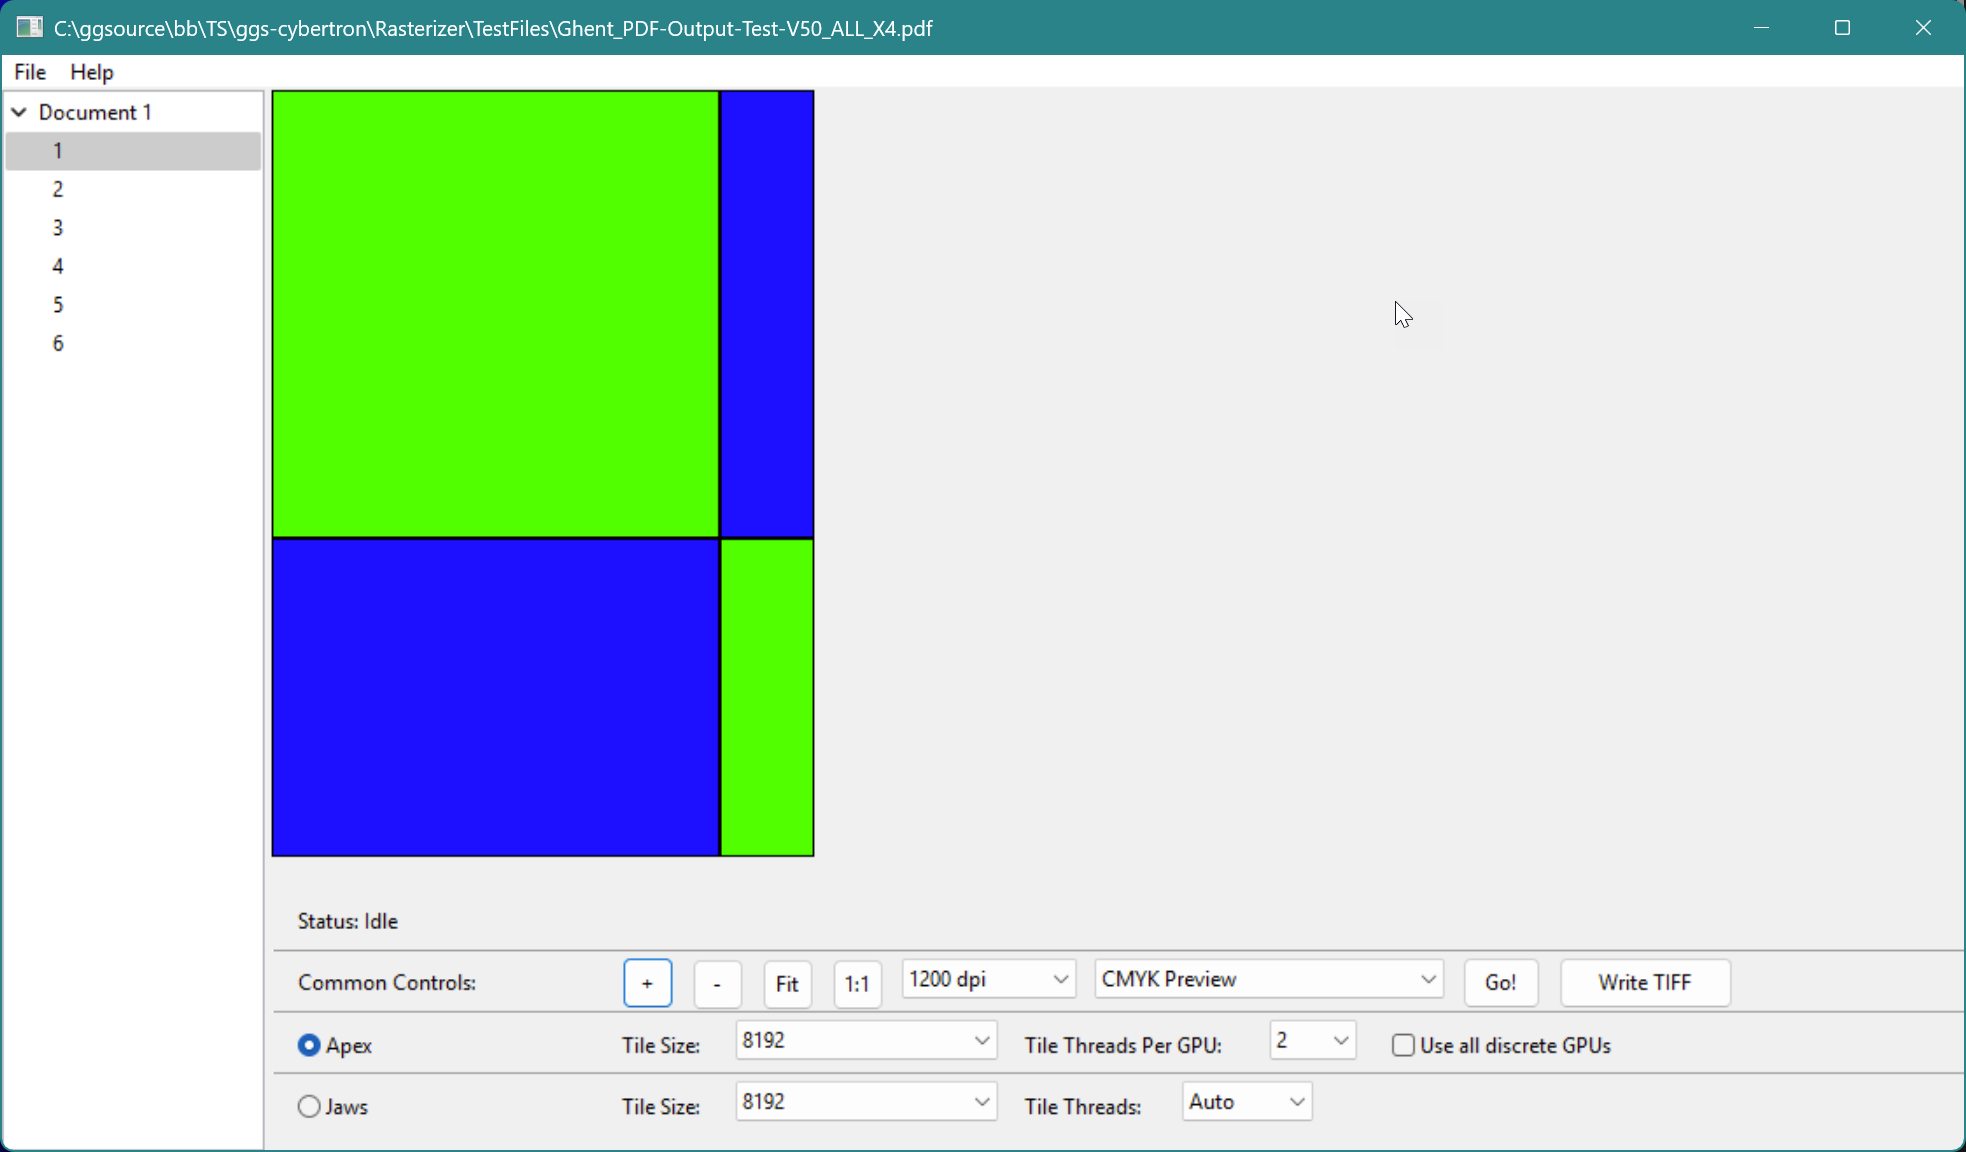
ApexTiledViewer
This application was conceived as a demo. Initially, the window is empty. Page numbers are presented in a column on the left; click one of these, and a checkered box is shown, representing tiles (a section of the page) that will be rendered by your choice of renderer, either Apex or Jaws, when you click the Go! button.
The tile size can be controlled from the Tile Size pull-down menu, and are scaled according to the resolution setting found on the Common Controls on the row above.
There you will also find
[+],[-],[Fit]&[1:1]buttons that control zoom; these will work even when the renderer is busyThere are two rendering settings, CMYK Preview and CMYK + Spots Preview. The latter will ensure that spot colors with overprint settings are presented as they would be printed. This choice is necessary for correct rendering of GWG reference pages, as in this example:
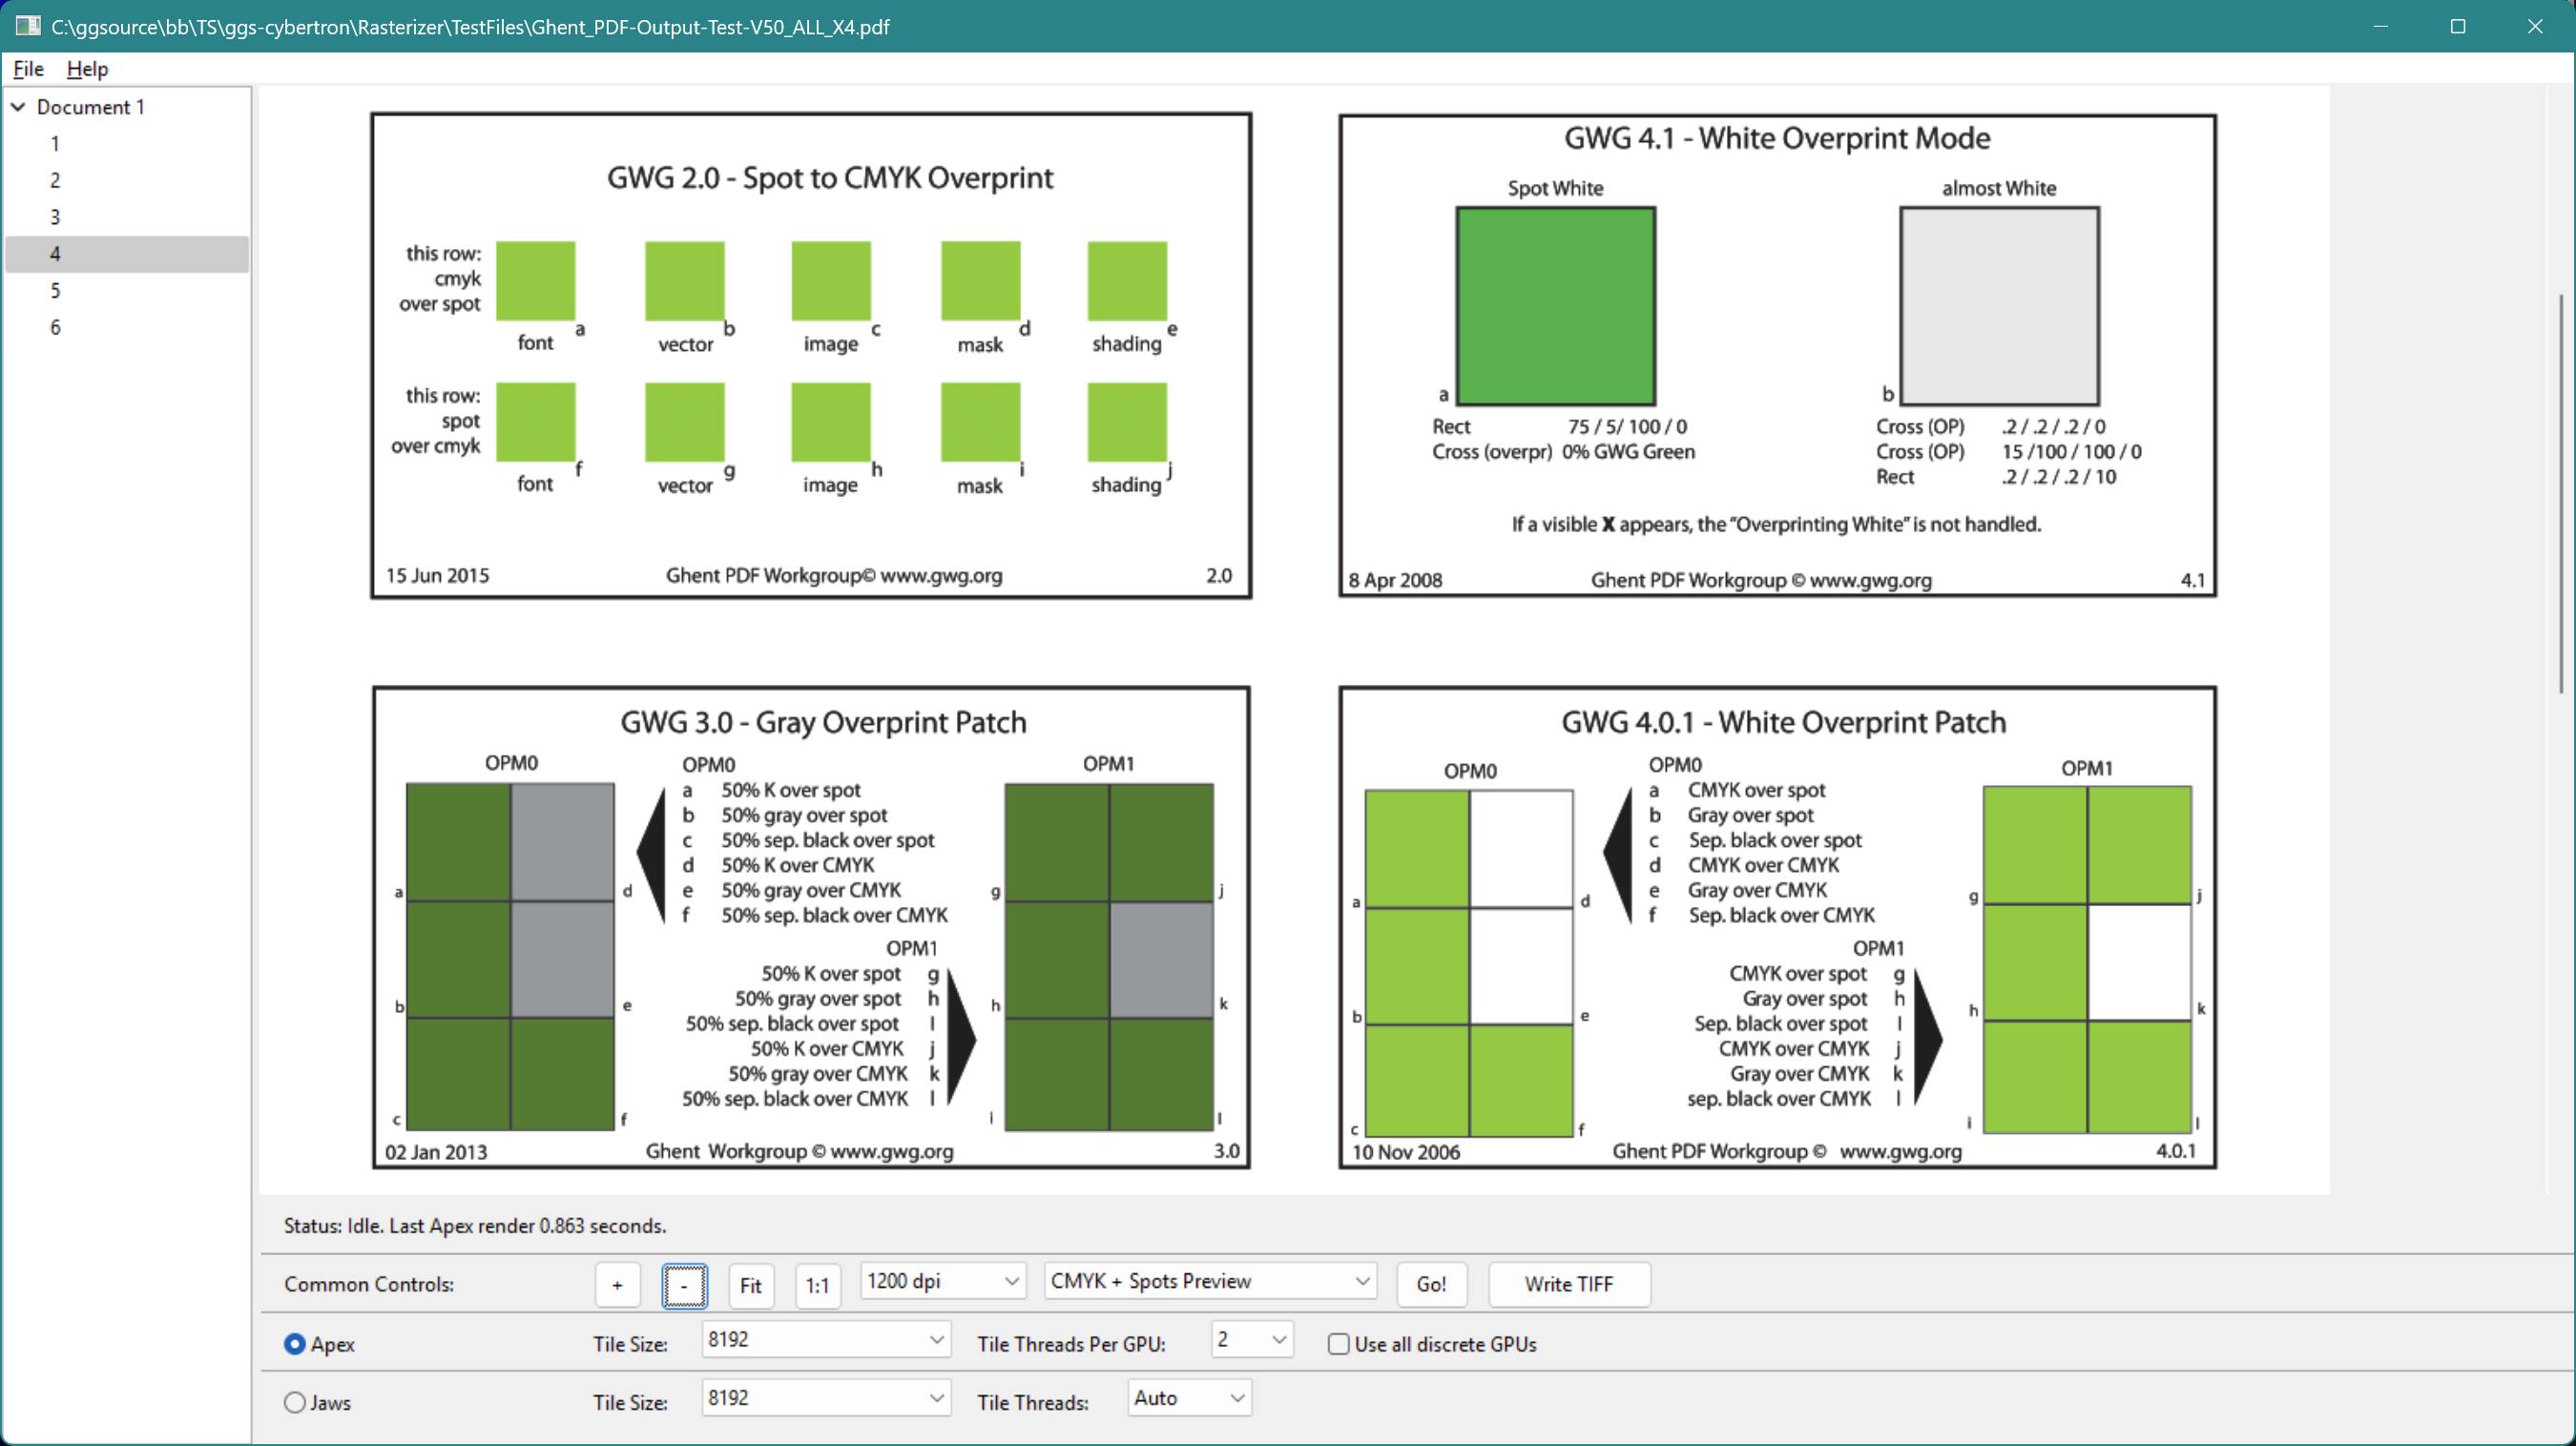
Rendering of CMYK + Spot overprint of a GWG reference page
After the renderer has completed the page, the time taken is shown below the image. The full-sized rendering can be saved to disk with the Write TIFF button.
Apex-specific settings
Tile Threads per GPU specifies the number of tiles that Apex will work on simultaneously, per GPU. Having more tiles in flight can improve throughput, by ensuring that the GPU always has work available. A value of 2 is usually close to optimal.
Use all discrete GPUs This application uses only discrete GPUs, not those that are integrated into the CPU. Most laptops have both, an integrated and a separate, discrete GPU. Desktop machines with a sufficient number of slots on the motherboard and physical space can have two or more discrete GPUs. When this control is checked, Apex will make use of all available GPUs, dividing rendering tasks between them.
Jaws-specific settings
Tile Threads refers to the number of rendering threads that will be created, each one assigned to a tile of the page on a round-robin basis. This is a common approach to speeding up Jaws rendering, and can pay significant dividends when many cores are available, providing there is also plenty of memory.
Using simpleapexrender
This is a command line app that requires only the executable file simpleapexrenderer.exe to run.
At its simplest, you can run it with a command like this:
.\simpleapexrender.exe '.\Cover Girl.pdf' '.\Cover Girl.png'The app then renders the page, encodes the image to the requested format and reports timing, for example:
ElapsedTime::Fetch page  0.058116
ElapsedTime::Render page 0.708687
ElapsedTime::Render Total::AVG  1.079074
ElapsedTime::Render Total::TPUT 0.926720
ElapsedTime::Render Total 1.079074
Usage
Running the application without arguments will display usage information:
Usage: simpleapexrender <source file> <output file or file pattern> [ key=value ... ]
Input and output
 <source file>                       Path to any input file supported by Mako
 <output file | file pattern | none> Can either be a PDF file, "none", or a printf style pattern
                                     for a PNG, JPEG or TIFF where %u is replaced with the page
                                     number (starting from 1).
                                     For example:
                                       - "out.pdf", where each page will be rendered
                                         into images within a single pdf "out.pdf".
                                       - "out%u.png", where each page will be rendered
                                         into a series of PNG files (out1.png, out2.png etc.
                                       - "out%u.tif", where each page will be rendered
                                         into a series of TIFF files (out1.tif, out2.tif etc.
                                       - "out%u.jpg", where each page will be rendered
                                         into a series of JPEG files (out1.jpg, out2.jpg etc.
                                     Here, PNG only supports RGB formats. JPEG only supports 8-bit results.
                                     Specifying "none" as the file name results in rendering only with no output.
Rendering controls
Once the input and output are specified, a series of key/value pairs, in the form of [key=value key=value ...], can be added to the command line to control aspects of the rendering.
Supported options are:
 - res=<integral resolution for x & y axes>
 - xres=<integral resolution for x axis>
 - yres=<integral resolution for y axis>
 - depth=<8 | 16>
 - alpha=<true | false>
 - overprintpreview=<true | false> (cannot be used with alpha)
 - aafactor=<1 | 2 | 3 | 4>
 - bigtiff=<true | false>
 - use16bitinternalrendering=<true | false>
   If true, then all intermediate rendering is performed using 16-bit
   depth before being downconverted to 8-bit before being copied from
   the GPU. The default is false.
 - processspace=<gray | rgb | cmyk>
 - processprofile=<path to a gray, RGB or CMYK ICC profile>
 - useoutputintent=<true | false>
   If true, and the input has a PDF CMYK output intent, then the output
   intent will be used as the process space, and if the final space is
   CMYK, then this intent will be use as the final space.
 - finalspace=<gray | rgb | cmyk>
 - finalprofile=<path to a gray, RGB or CMYK ICC profile>
 - optionalcontentevent=<none | view | print | export>
 - threadspergpu=<integer> The number of tile threads to use per GPU. The default is 1.
 - useallgpus=<true | false> If true, multiple renderers will be used for
   different pages if multiple GPUS are present. The default is false.
 - excludeintegratedgpus=<true | false> If true, integrated GPUs will not be used for
                                         usallgpus. The default is true.
Example

When PDF is chosen as an output format, a “raster” PDF is produced that contains one rendered image per page, at the chosen resolution and color space.