
Building the HHR RIP from within the VS project
This page applies to Harlequin v13.1r0 and later; and to Harlequin Core but not Harlequin MultiRIP.
The HHR SDK and test application is supplied with a Microsoft Visual Studio 2019 (VS2019) project file clrip.vcxproj, which is in the folder where the HHR RIP was installed. This folder also contains an options.h header file, which is used by the Visual Studio project.
You must have Microsoft Visual Studio 2019 installed to use the clrip.vcxproj file.
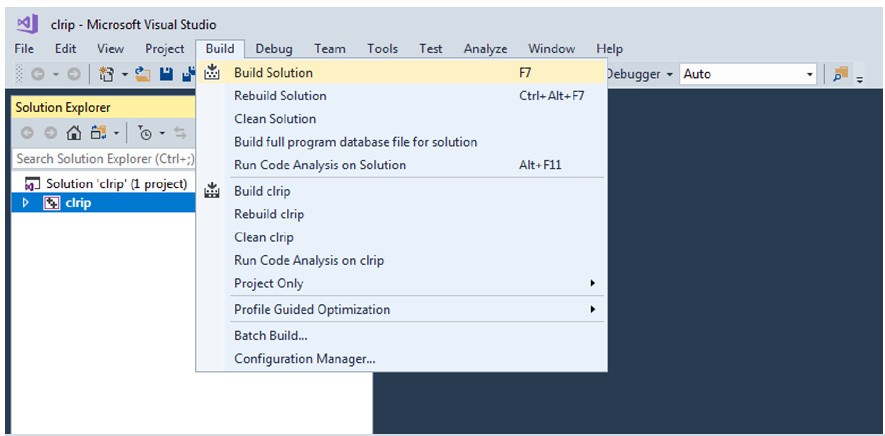
If you would like to try out re-building clrip.exe using VS2019, see the following screen capture, which is similar to what you see (dependent upon your use of either the Professional version or the Enterprise version):
- Double-click
clrip.vcxprojto open the project in VS2019. - In the “Solution Configurations” window (that is, the window that displays “Debug” the first time you open the project), either leave it as Debug or select Release to build either a debug or a release version of the HHR RIP from the source code.
- In the menu bar along the top of the project, click Build and then Build Solution from the dropdown menu that opens.
Once the build is finished, a new HHR RIP executable clrip.exe displays in one of the following locations:
For x64 builds:
<HHR install folder>\bin\x64\Debug
<HHR install folder>\bin\x64\Release
For Win32 builds:
<HHR install folder>\bin\Win32\Debug
<HHR install folder>\bin\Win32\Release