
Running the HHR RIP from within the VS project environment
This page applies to Harlequin v13.1r0 and later; and to Harlequin Core but not Harlequin MultiRIP.
Having built the HHR RIP using VS2019, you likely wish to run it from within the Visual Studio 2019 environment. You can do so as follows:
- In Solution Explorer, click clrip so that it is highlighted, then click Project in the top menu bar of VS2019, and click Properties in the dropdown menu, as shown in the release build screen capture above.
- In the clrip property pages dialog, click either Debug or Release in the Configuration selection box, (depending on which version of the HHR RIP you built).
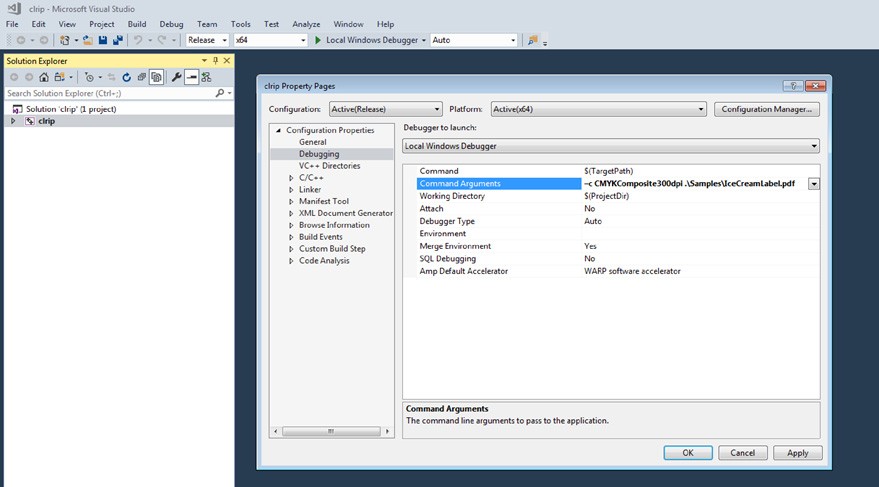
- Under Configuration Properties, select Debugging.
- In the Command Arguments box, simple usage would be:
-c <config> <inputfile>
To print one of the supplied sample jobs to a simple CMYK setup, type:
–c CMYKComposite300dpi .\Samples\IceCreamLabel.pdf
Notice that the working folder is now the folder containing the HHR RIP's SW folder, and that you are now running the executable you built earlier.
Once you have run the job and have finished with the project, if you choose to save a solution file when you are asked whether you would like to do so, Visual Studio saves the above command-line arguments for you.