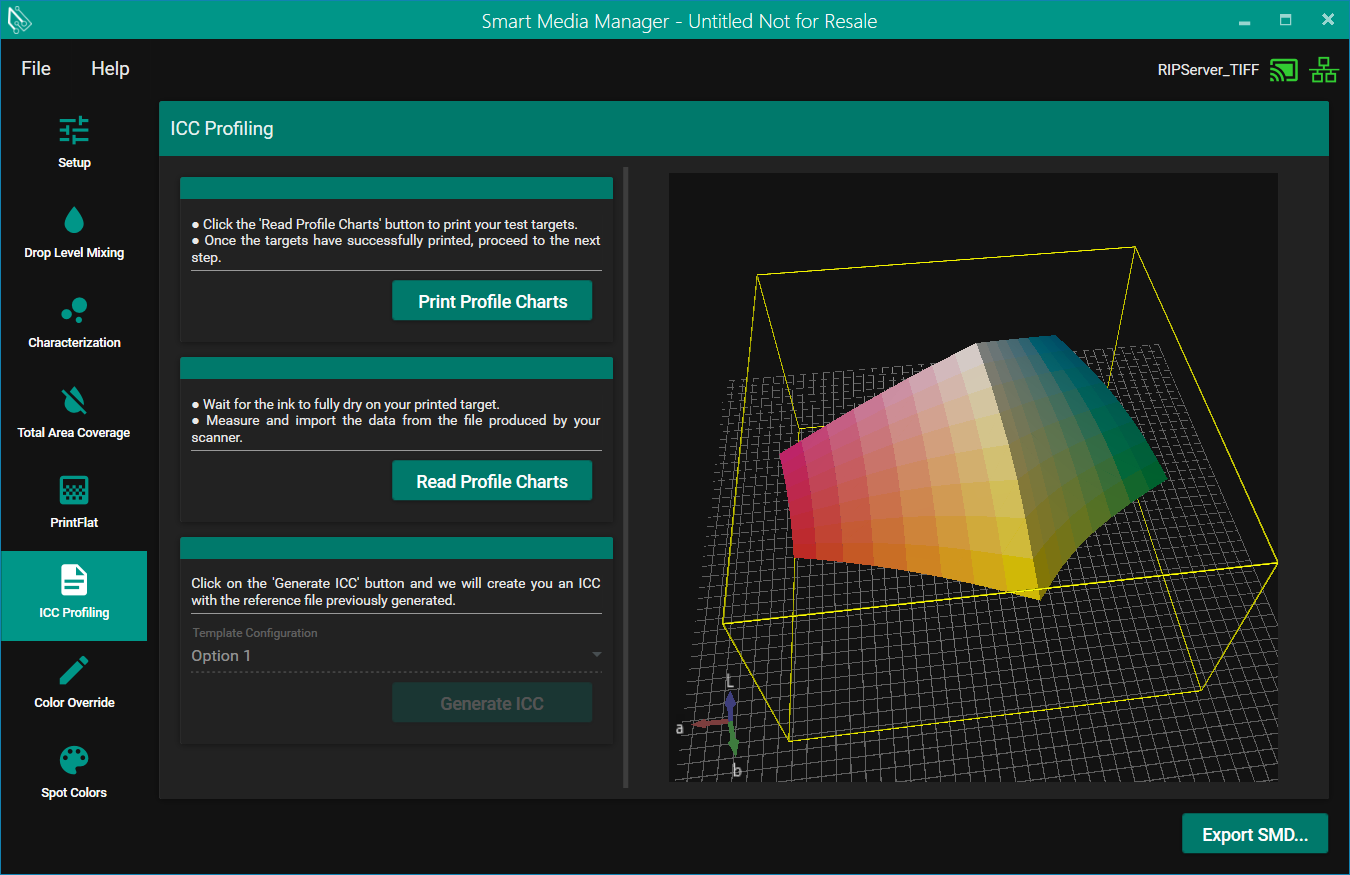
ICC Profiling
The ICC Profiling stage is made up of 3 steps:

Step 1: Print test chart

The first button is 'Print test chart' this will allow you to print out a test chart via SPC.
Step 2: Import data

The next button is 'Import data', this allows you to import the scanned data into the measure tool for us to make a ICC profile with.
Step 3: Generate ICC

Finally the last button is the 'Generate ICC' button this will ONLY be enabled if you have data imported. Once you do you can now make a ICC Profile.
Template Configuration

This will change how the ICC is created. We have supplied 4 default options.
All but 2 of the settings are the same for all 4 default templates we provide. The settings that differ are black start and pure gray.
- Option 1 - Has black start as 25 and pure gray on.
- Option 2 - Has black start as 25 and pure gray off.
- Option 3 - Has black start as 35 and pure gray on.
- Option 4 - Has black start as 35 and pure gray off.
You can create your own templates and copy them to the installed location then under \Resources\IccConfigs.
If setup correctly you should be able to generate an ICC with custom settings (For the best results, don't change or remove the tokens).
Naming an ICC


This window will appear when you press "Generate ICC", this allows you to name the ICC you are about to create.
Color Override

In the final step you can change aspects of the SMD, such as what the input profiles are and this will be saved and imported into the new SMD you make.
