
Job Editor
Job Editor
To invoke the Job Editor, click the pencil icon next to the job, which opens a window showing the selected job.
If a suitable ICC output profile is present for the active Media, it is used in the Job Editor.
All editing features will be disabled when RIP Ahead jobs are loaded.

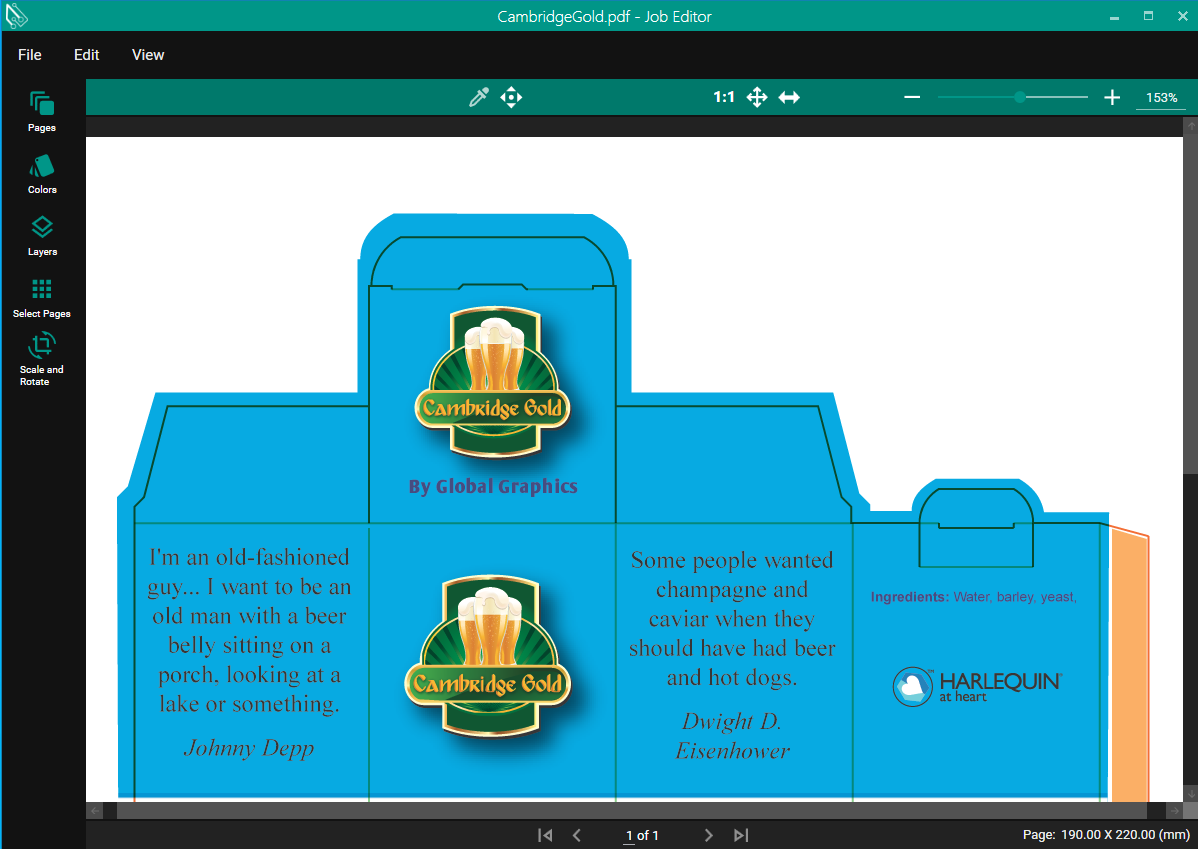

As shown above, there are a few controls that can be used to interact with the page.
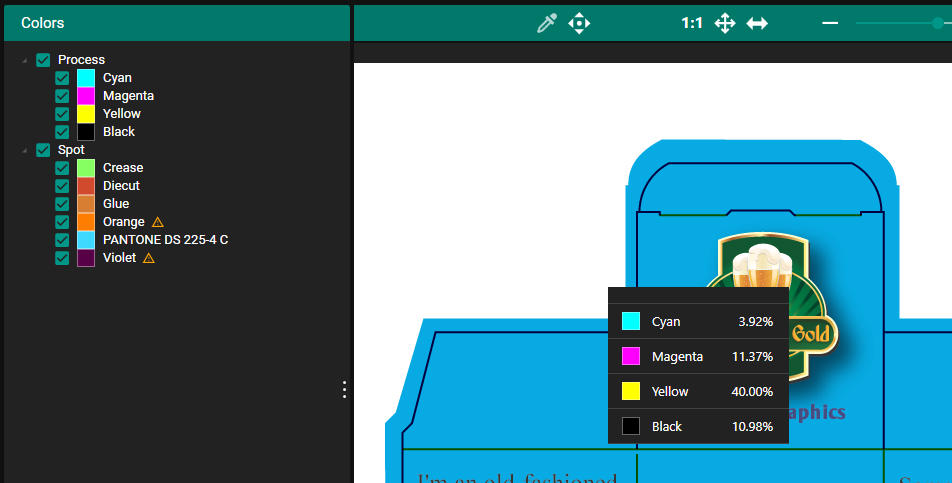
The first button sets which tool can be used which can be either an Eyedropper tool or a Panning tool.
The Eyedropper tool displays the color values of the pixel selected by clicking on the page.
Only the colors with positive values are displayed.
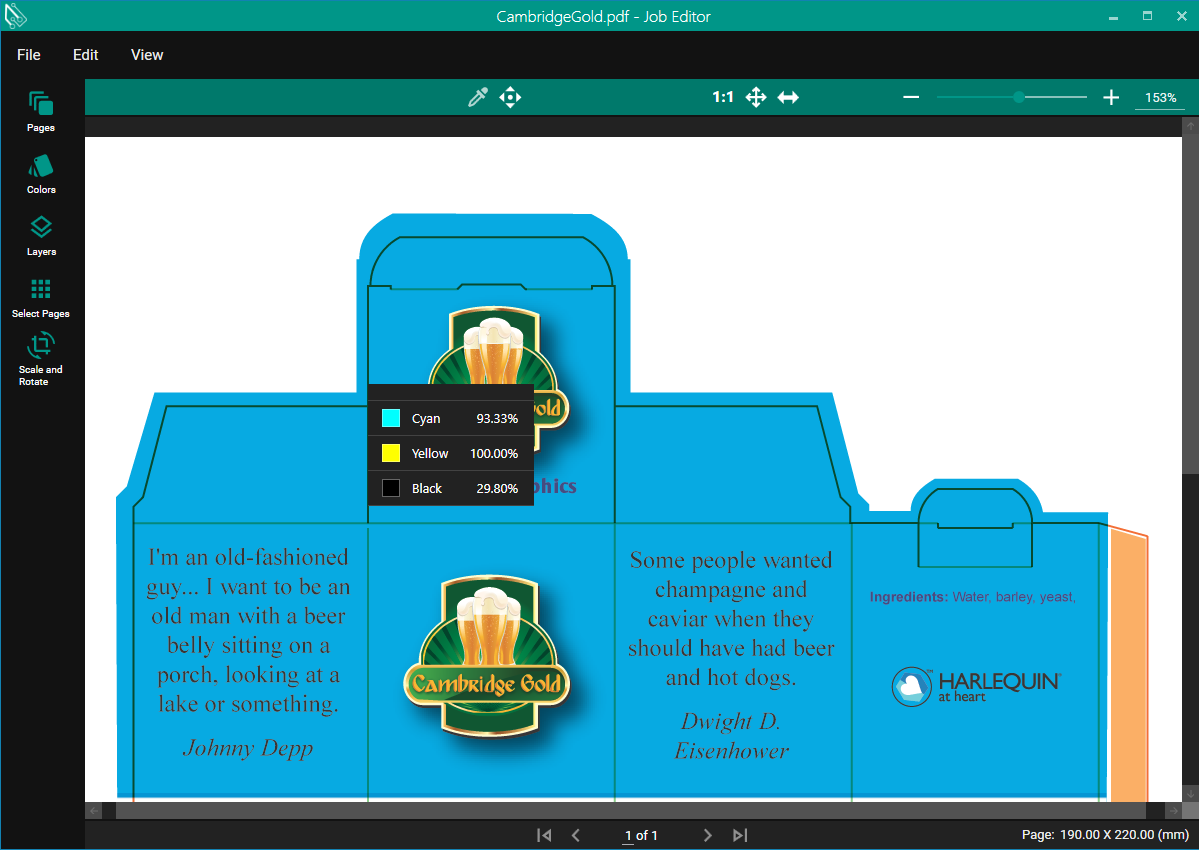
The Output Preview feature in the Job Editor provides a visual preview similar to Adobe Acrobat’s Output Preview. For N-channel ICC profiles like CMYKOV (6-color process), it treats the additional process colors (OV) as standard process colors while maintaining the behavior of spot colors unless manually converted. The rendering adjusts with different media and ICC profiles, and the Eyedropper tool will display color values accordingly, showing six colors for a 6-color ICC profile and four for a 4-color ICC profile. This ensures users can accurately see how different ICC profiles and media types affect their document, facilitating precise color management.
CMYKOG:
CMYKOV:
CMYK:
The Panning tool moves the view of the page while zoomed in by clicking and dragging on the page.
The following controls are tied to page zoom.
The Actual Size button changes the zoom level to 100%.
The Fit to Page button changes the zoom level to one where the whole page is visible.
The Fit to Width button changes the zoom level to one where the full width of the page is visible.
The Zoom in button increases the zoom level up to a maximum of 6400%.
The Zoom out button decreases the zoom level down to a minimum of 10%.
The Zoom slider changes the zoom level by dragging and displays the zoom level as a percentage.
Select Pages
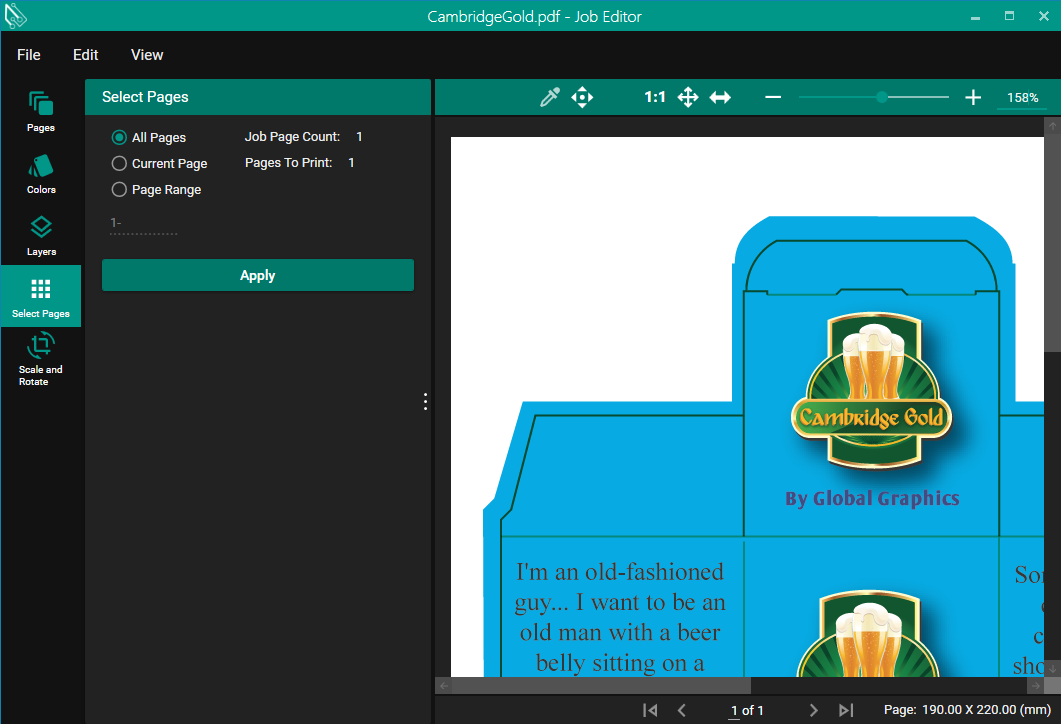
As shown above, you can use the Job Editor to specify a Page Range.
You must press Apply if you change the page range, and you must save the file before exiting the application; failure to do so results in losing the changes.
Page Selection
This menu allows you to choose the pages that print out when this PDF goes through a Print Run. There are three options for Page Selection:
- All Pages prints all of the pages in the PDF, in the order that they are in. This is the default mode.
- Current Page prints only the page that the Job Editor is displaying. In the screenshot above, it would print page 1 only.
- Page Range allows you to type in a set of pages that you want to select for print in the text box below.
Page Ranges
There are three types of Page Ranges that are accepted:
- 1 would print page 1 only.
- 2- would print from page 2 to the last page of the document.
- 3-7 would print all pages between 3 and 7 (inclusive).
These can be concatenated with commas; for example, the Page Range "1-3,5" would select pages 1, 2, 3, and 5 in that order.
You can specify the same page number multiple times; for example, the Page Range "1,1,1,1" would select page 1 four times, or the Page Range "1-,1-,1-" would print the whole document three times in a row.
Scale and Rotate
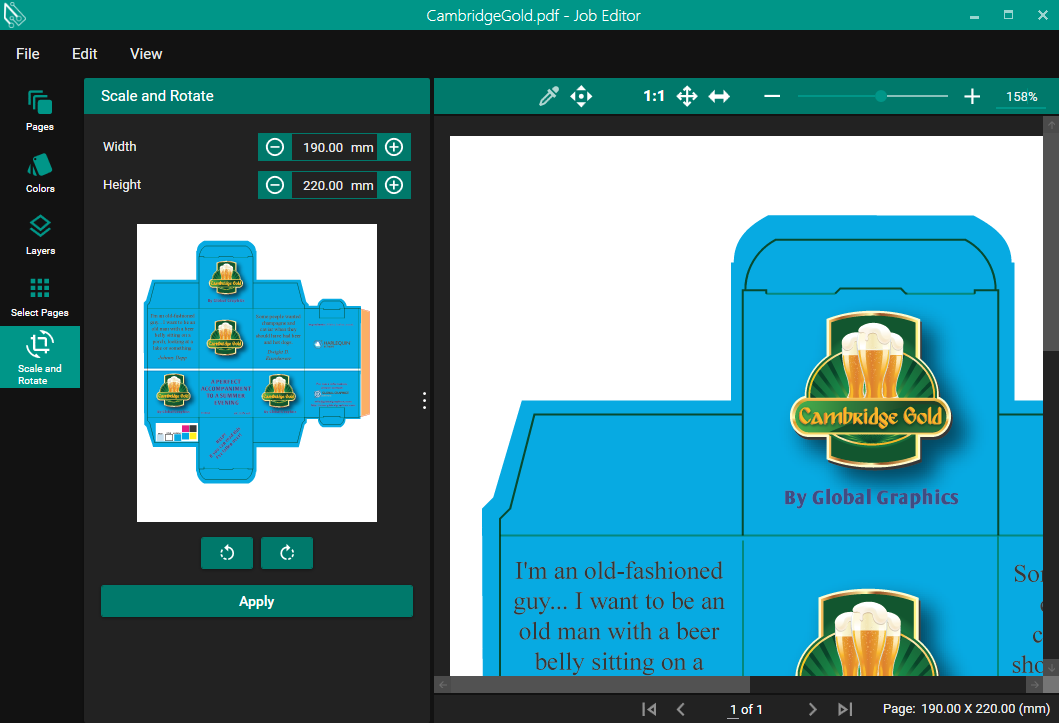
These controls allow you to specify the new width and height to set the document to. This will scale the contents as well, preserving the position of all elements in the job.
The valid values are anywhere from 10 times smaller than the current dimension, to 2 times larger than the current dimension, and is a value that will not exceed the media width while accounting for the document rotation and the "Print Bars Horizontal To Image" setting of your Smart Device Configuration.
Document Rotation
The two buttons below the document preview will rotate the preview by 90 degrees clockwise or anticlockwise. When you are happy with the orientation of the preview, pressing Apply will commit that rotation to the real job.
Pressing Apply after changing the Document Rotation or either of the Scaling options will require the document to be saved automatically. A confirmation dialog will appear to allow you to back out.
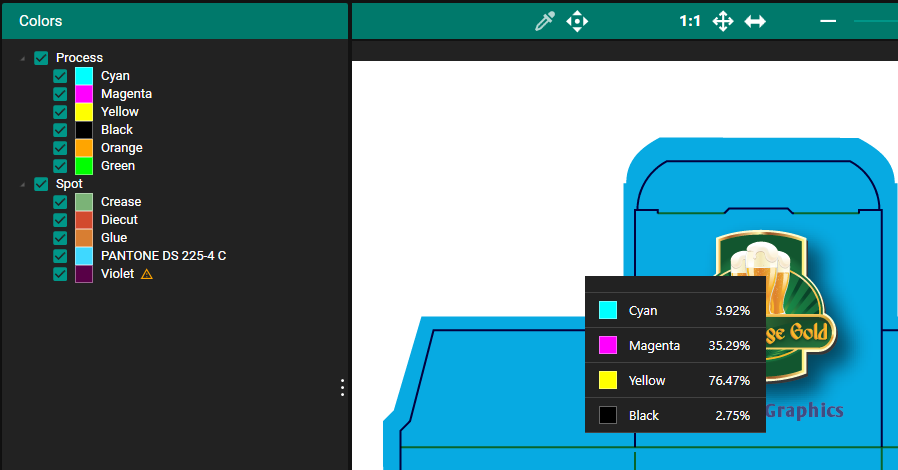
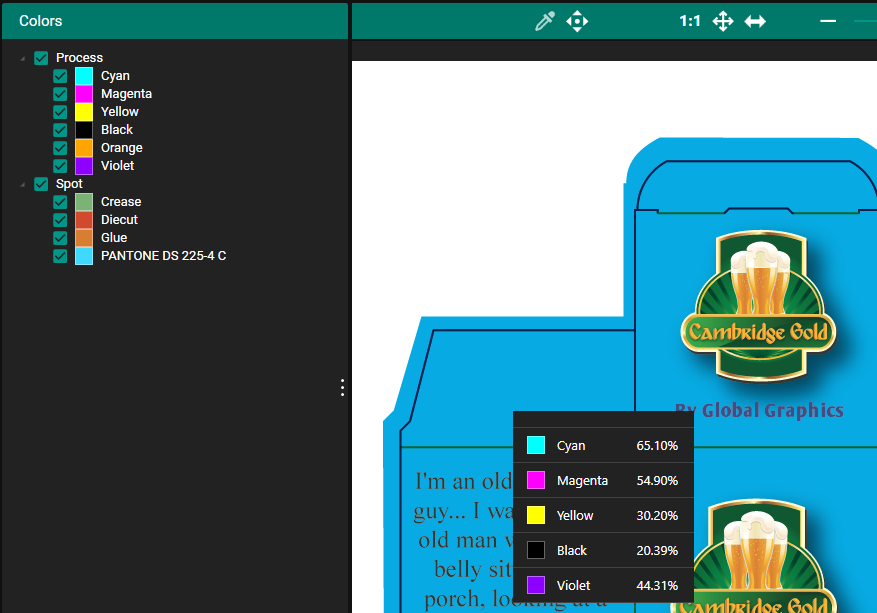
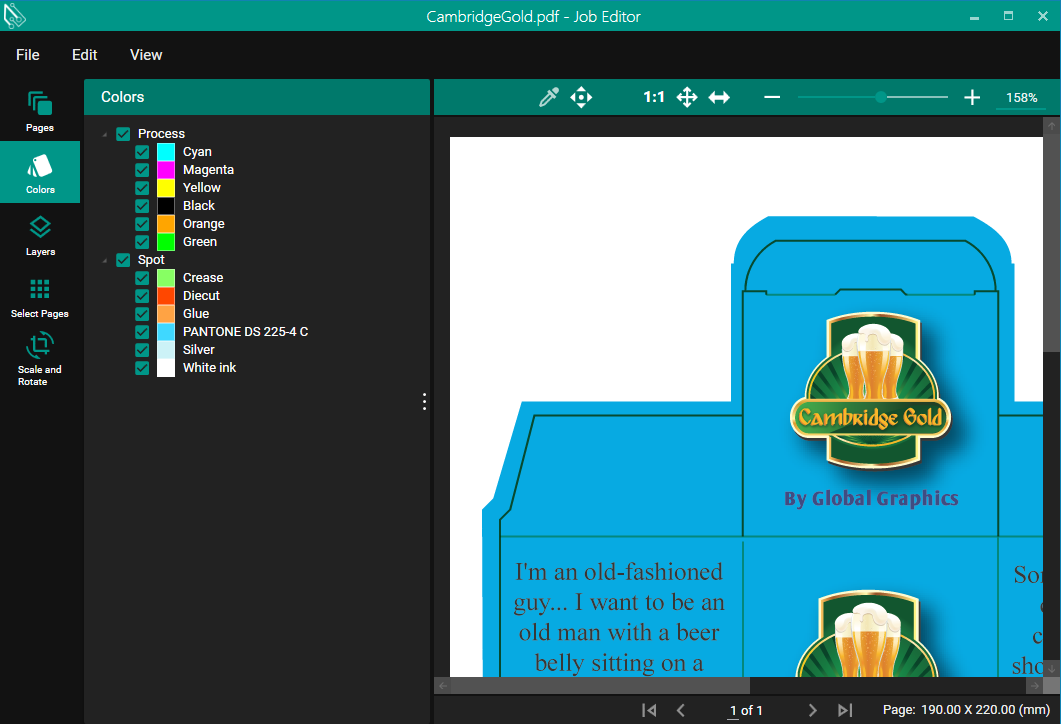
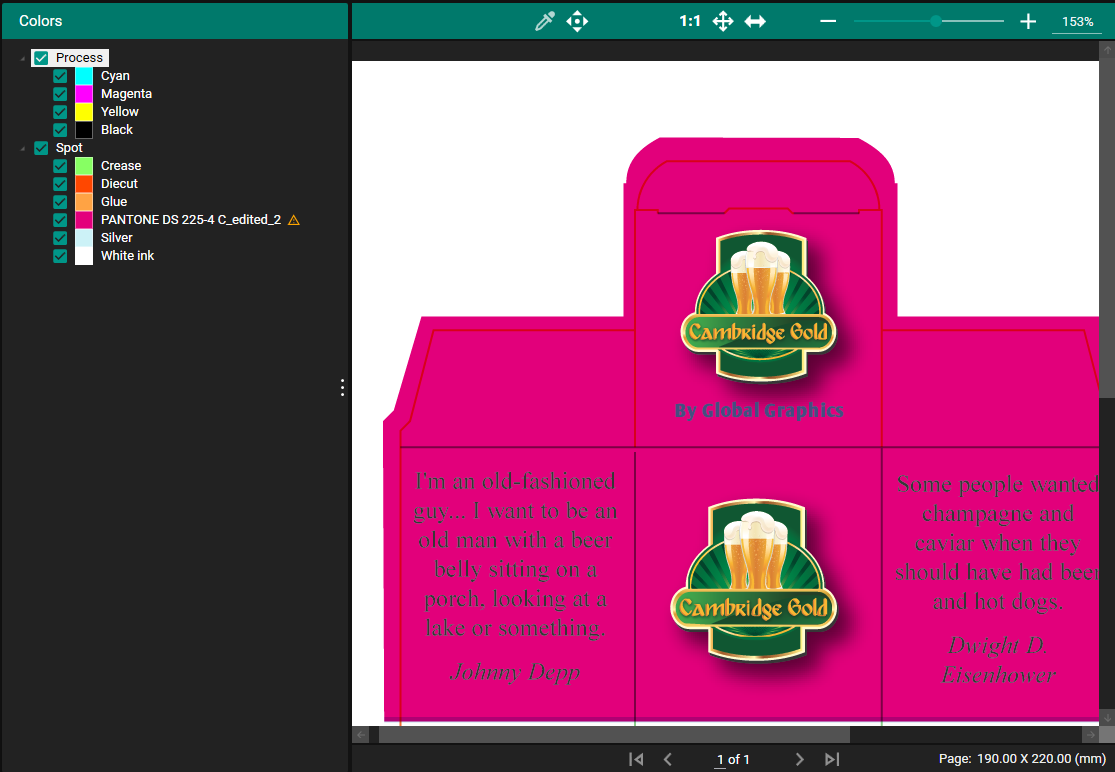
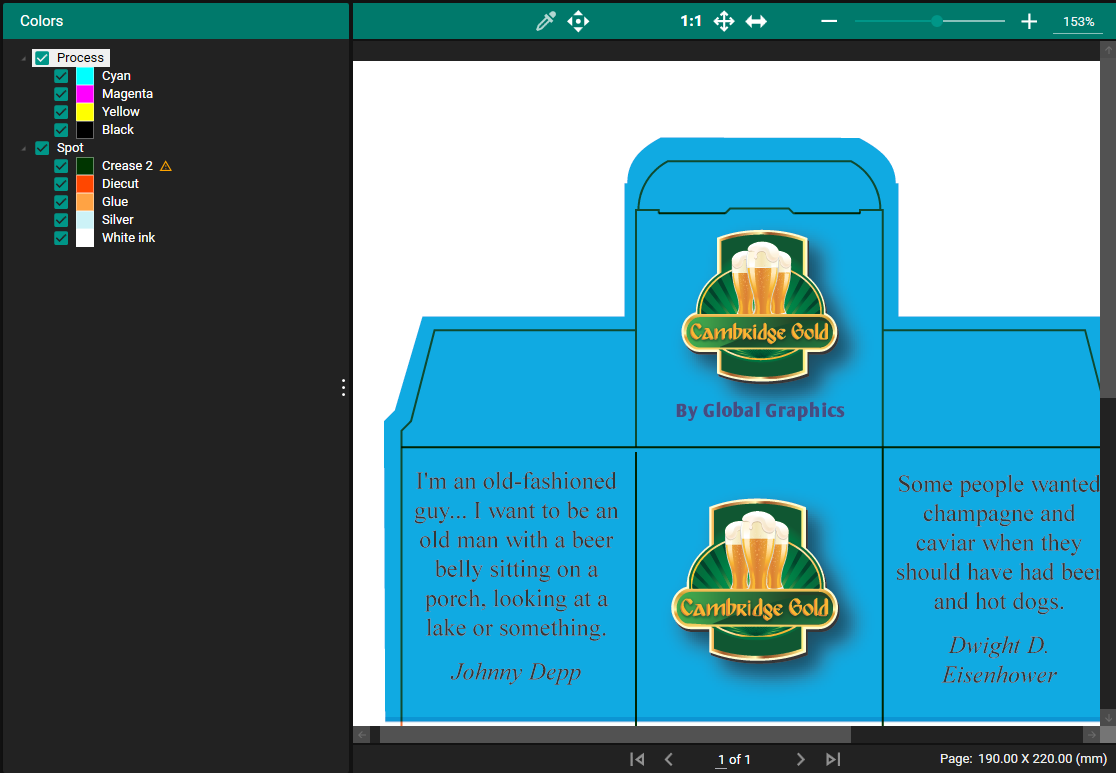
Spot Color Editor
In the Color Tab you can see what Colors are specified in the PDF Job both Process and Spot Colors. Process Colors that are supported are CMYK, CMYKOV and CMYKOG.
CMYK:
CMYKOV:
CMYKOG:
The Spot Colors may contain Technical separations, Metallic inks or white backing as well as traditional spot colors such as Pantones.
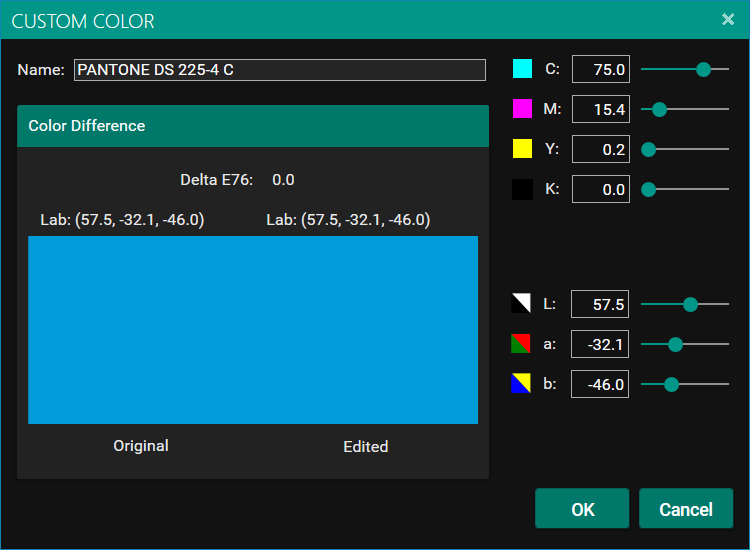
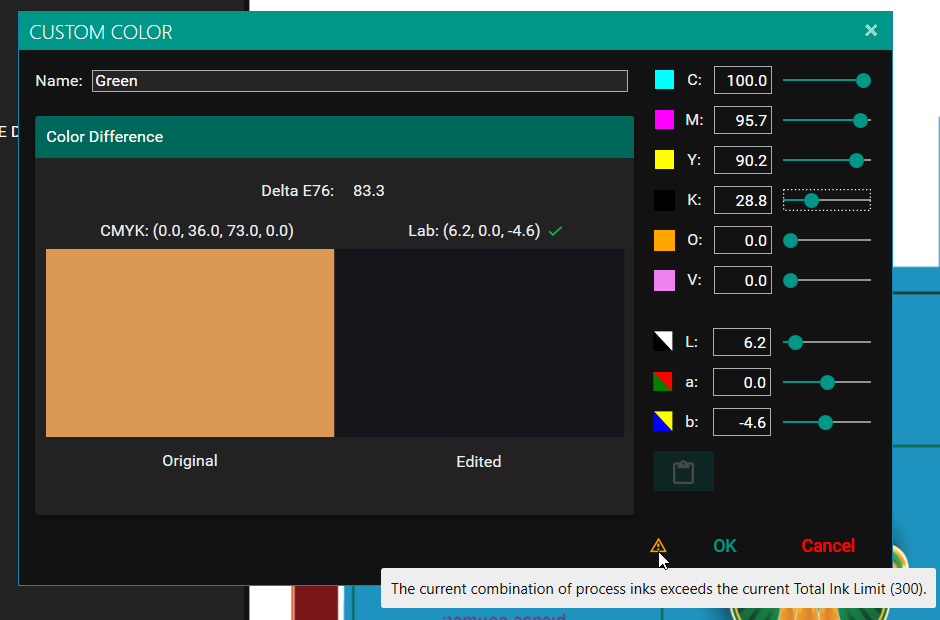
If a color is out of gamut then a warning triangle is displayed. If you place your cursor over the triangle the delta E or color difference value is displayed to show you how far out of gamut it is.
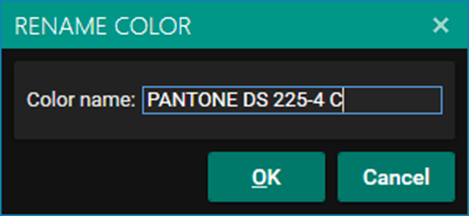
If you select a color you have the option to “Rename Color”, “Change Color”, “Convert to Process Color” or “Replace with In Gamut Color”.
Renamed color is saved in Custom Colors library.
If the media that the job is associated with has a Total Ink Limit profile, then a warning triangle will appear if the sum of the process colors exceeds the Total Ink Limit.
If "Allow TIL to be exceeded in Custom Color" is disabled in SPC's Engineer pane, then the OK button will be disabled when this warning appears - otherwise it will remain enabled.
Thumbnail
The thumbnail is updated to reflect any color changes made through a new preprocessing step, which is capable of replacing the values of spot colors in the job found in the TCB inside the SMD.
Rename Color
Change Color
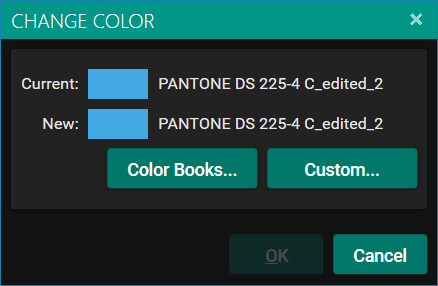
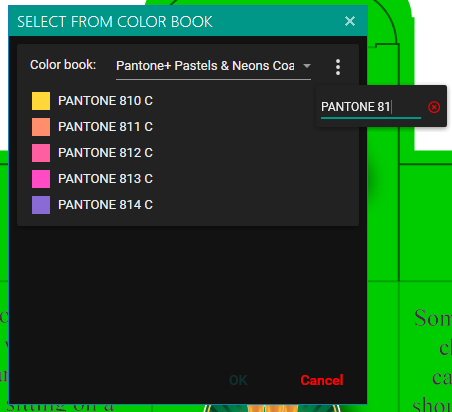
You can choose from the installed library.
Select a specific ink from a swatch library using search option.
Or Edit the color manually:
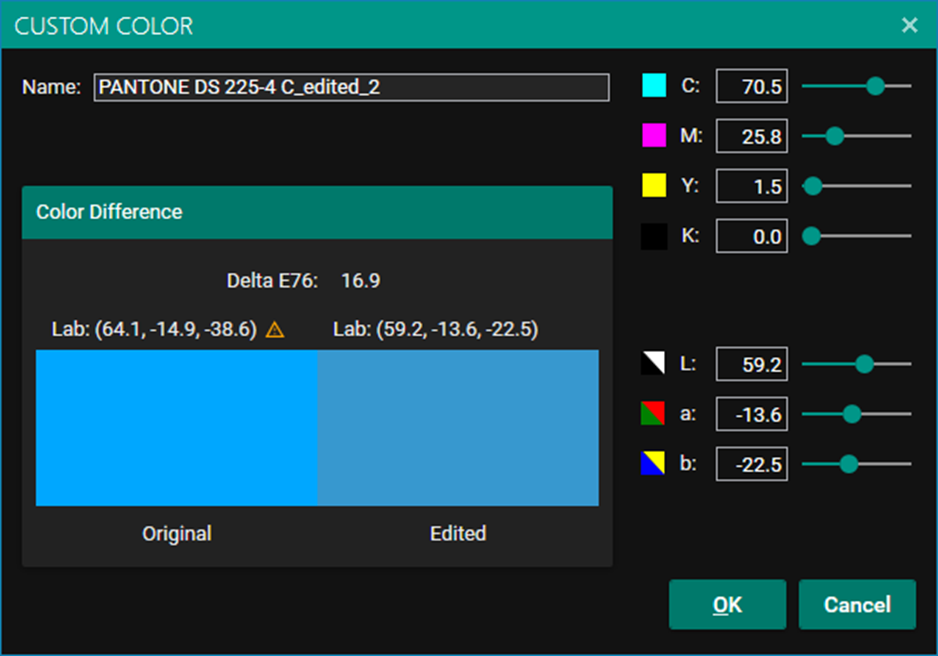
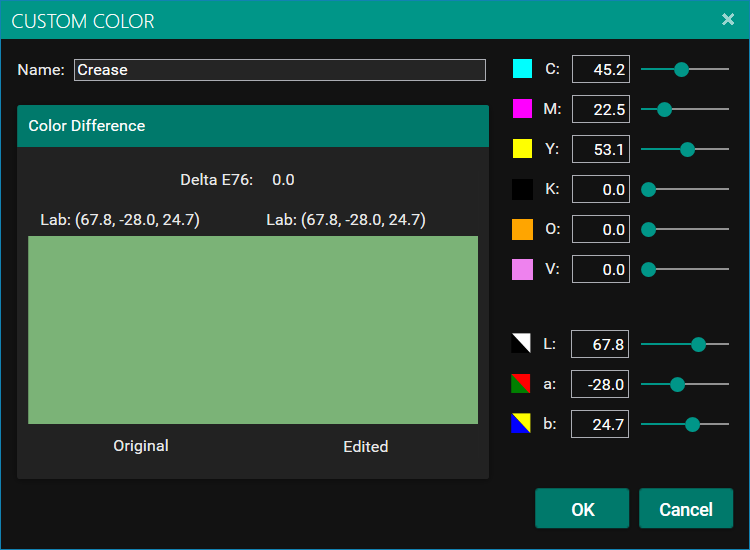
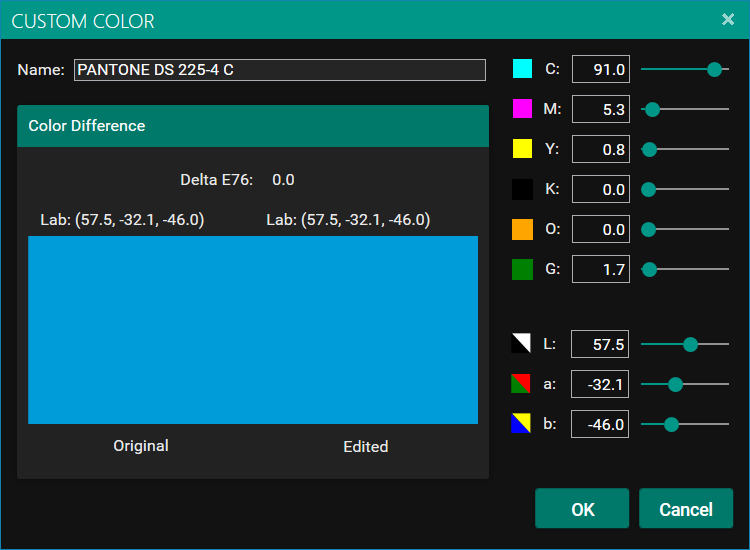
This will show the mapped in gamut color and the Delta E color difference. You can manually change the Lab value or the CMYK Sliders to change the colour. (Or CMYKOV sliders if you have a suitable ECG profile).
Save
When you exit the Job Editor after modifying a spot color, you'll receive a warning message:
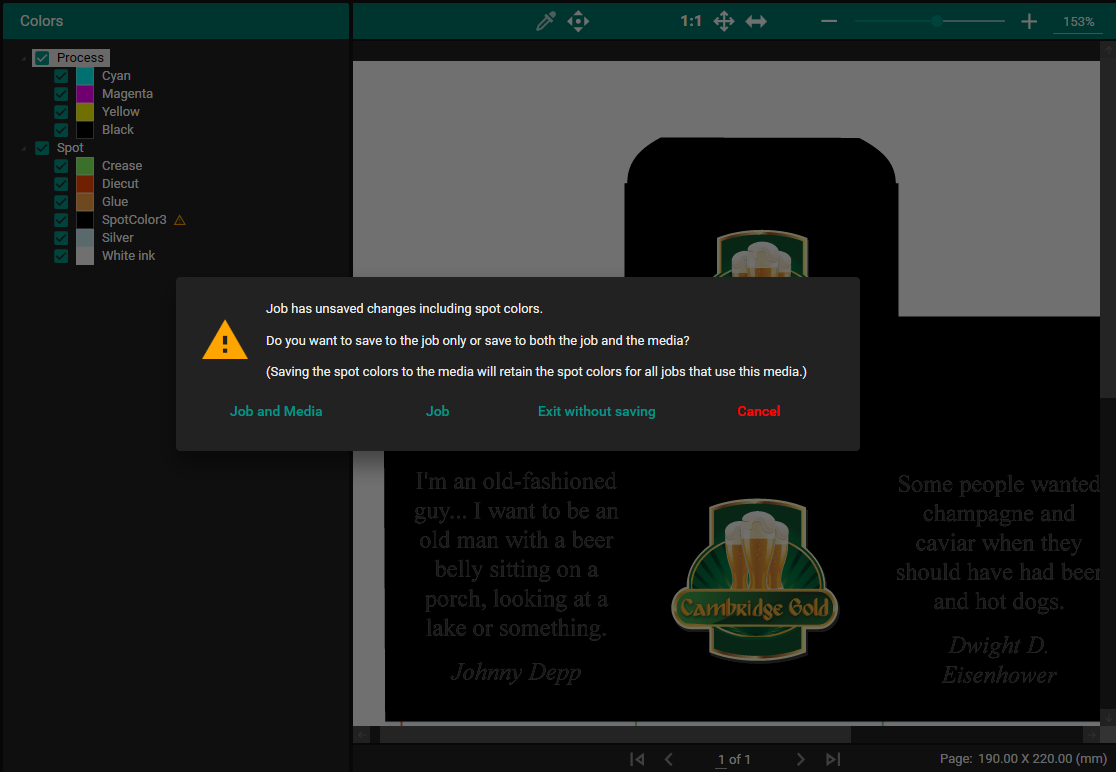
- Job and Media : Save the edited spot, assign the job, and save it to the Spot Overrides in the Media (SMD). Saving the spot colors to the media will preserve them for all jobs utilizing this media.
- Job: Simply save the spot color or job settings to the "Job."
- Exit without saving: Close the Job Editor without saving any changes.
- Cancel: Abort the exit process and return to the Job Editor.
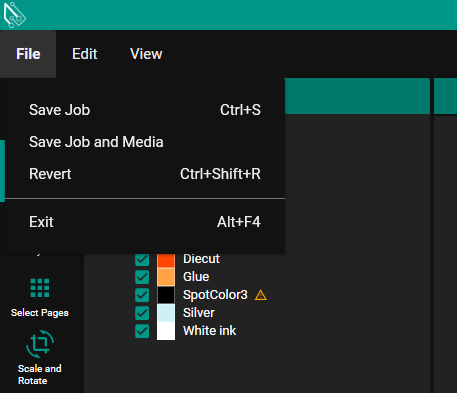
The above options can also be accessed from the File menu.
Log
Log file can be accessed from view menu.
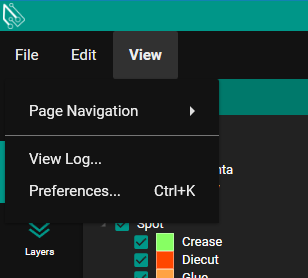
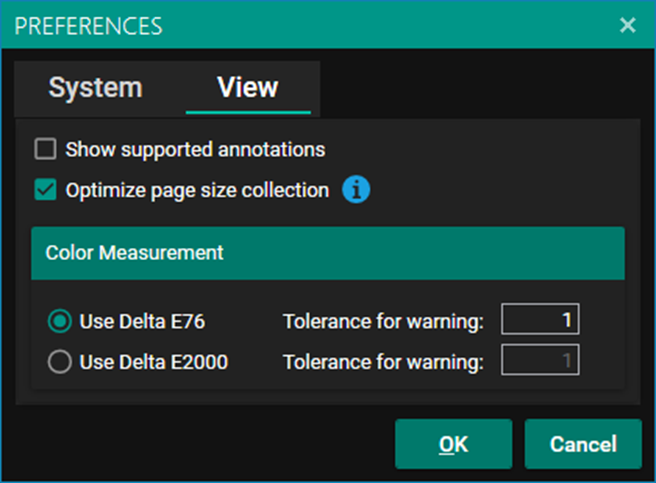
Preferences
You can change your preferences under the view menu. Here you can choose whether to calculate Delta E using the CIE 1976 standard or the CIE 2000 standard. You can also choose your tolerance for the out of gamut warning to be triggered:
Convert to Process Color
This converts the Spot Color separation to a CMYK color and combines it with the CMYK separations.
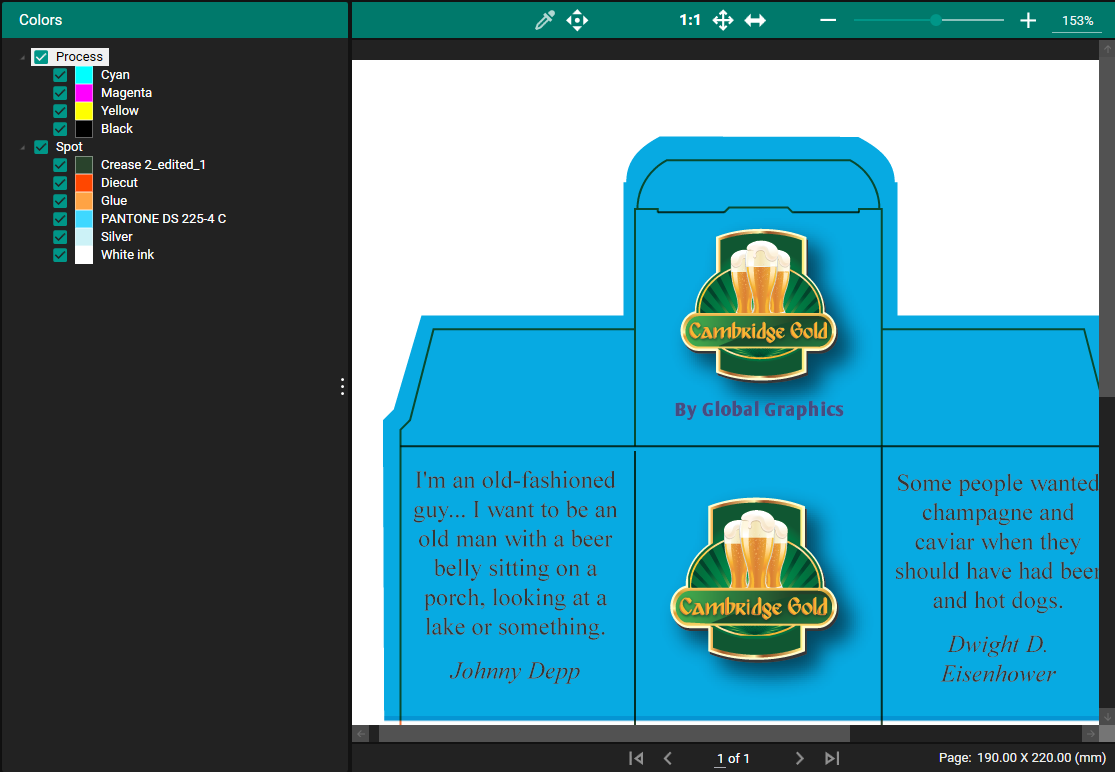
Convert to In Gamut Color
This converts the Spot Color to an in Gamut Color. The color name is renamed (to _edited) and the preview is updated.
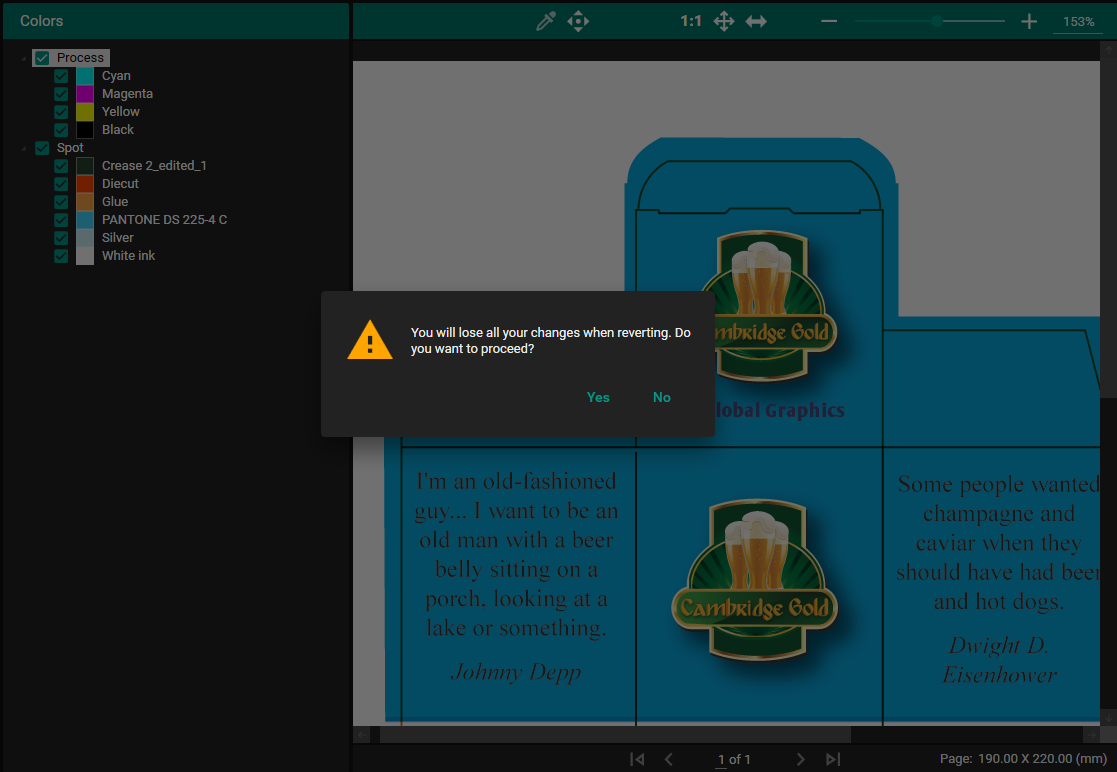
You can revert all changes
Layers

All layers in a PDF are viewable in the Layers pane. Each layer has two interactions available to them:
- Print
- This setting will determine if a layer will print when RIPped. As a visual aid, when this setting is changed, the job preview will update and display or hide the layer's contents.
- Locked
- This setting determines if the Print setting can be changed.
Spot Variations Chart
It allows the user to efficiently modify a spot color using a technique called "ring arounds".
This involves printing a reference patch of the original spot color along with adjacent patches that incorporate variations in cyan and magenta (or yellow) process color inks to achieve the desired ink mix.
The workflow consists of printing the original spot color and then introducing a small amount of cyan, magenta, or yellow to create the desired ink mix. The technician can compare this patch with the reference they are attempting to match. Once satisfied with the match, they proceed to adjust the spot color to reflect the CMYK values corresponding to the created patch.
The user has the flexibility to add or subtract up to three inks from an extended gamut ink set, excluding black.