
Submitting Your First Job (Smart Workflow)
Open the Job Station
Open the following link in a browser: http://localhost:9090/
The Job Station window displays. If the session times out, provide login details again to see this view.

Select the Test File
Select the first tab across the top of the page, Preflight Queue.
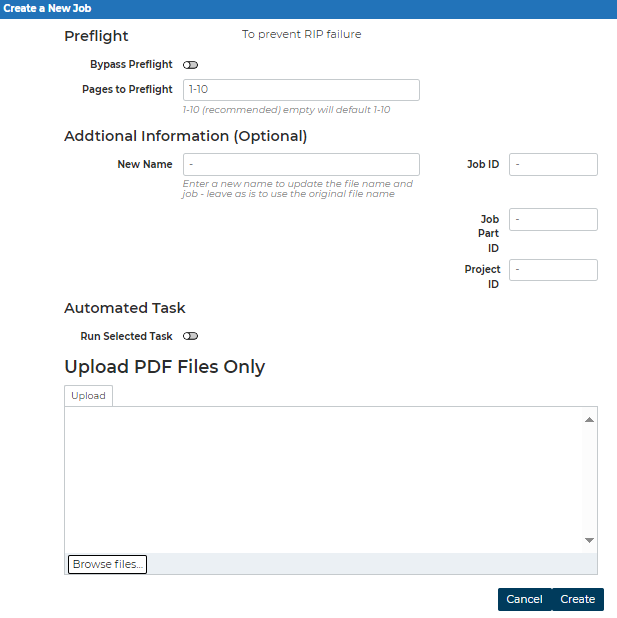
- Click New Preflight Job.
- Select a file using Browse Files.
- After the file uploads, click Create.
The file briefly appears in the Preflight Queue while it is being pre-flighted or waiting to be pre-flighted.
When the Preflight is complete, the job moves to the File Preparation Queue.
File Preparation Queue
Select the second option at the top of the page, File Preparation Queue.
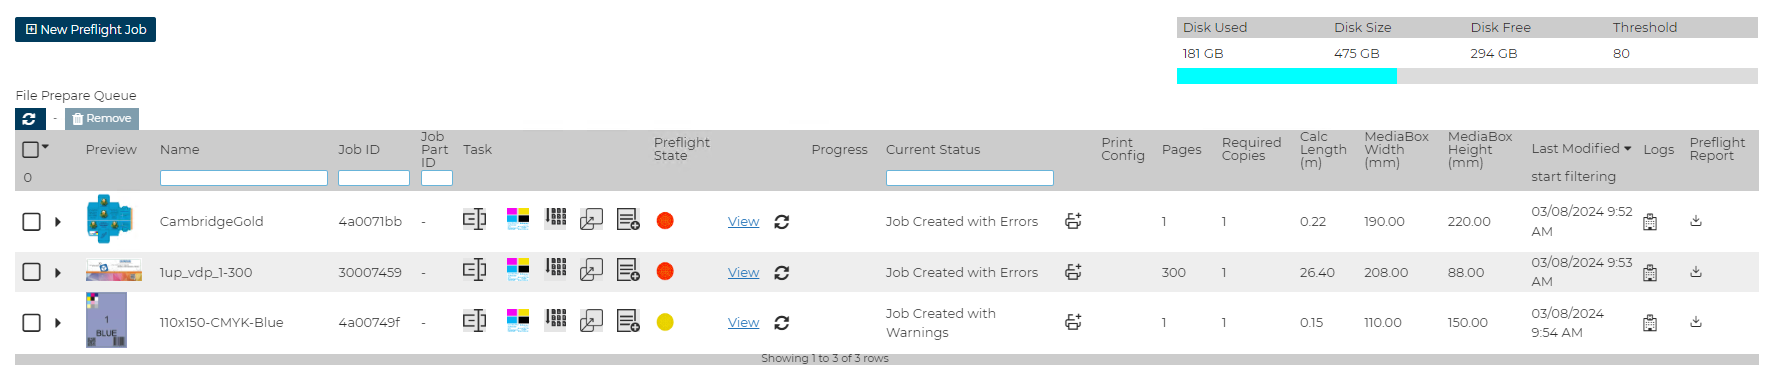
In this queue you can view the file and check the Preflight Report.
Send to Print Queue (SPC)
After preparing and checking the file is complete:
- Click the Send To Print Queue Icon

In the Send to Print Queue dialogue, Use the default settings for a first print.
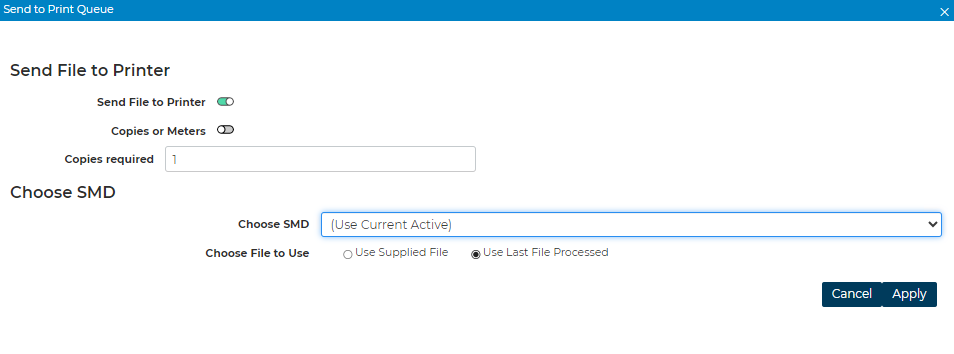
Click Apply.
The job goes to SPC; a few moments later, the job appears in the Waiting Queue.
The Smart Workflow process is now complete and the job passes to SPC for printing.