
PrintFlat
Copies
Select the number of "Copies" of the calibration target that you wish to print.
Using more copies gives a more accurate, more uniform calibration but takes longer to print and scan.
If you are unsure of the number of copies to use, then start with three copies and assess the print uniformity when printing with the calibration applied.
If the print uniformity is acceptable, try reducing the number of copies and generating a new calibration to determine whether you can reduce the time required to generate calibrations.
If the print uniformity is unacceptable, try increasing the number of copies and generating a new calibration, until you reach the point where the uniformity is acceptable.
Select which of the available colorants you wish to calibrate, then press Next.
Print targets
PrintFlat targets are required to be printed and scanned. Once scanned, they are processed to create a calibration that returns the press to a reference state.
To print the targets, press Print Targets.
To print targets successfully, the SPC instance must be in External Control mode. For more information, see: https://documentation.globalgraphics.com/sdfe/status-area
The targets are printed using the SPC instance that Smart Calibrator is connected to.
The targets are visible in the SPC queues.
Once the targets are printed and dry, they can be scanned in.
Scanning targets
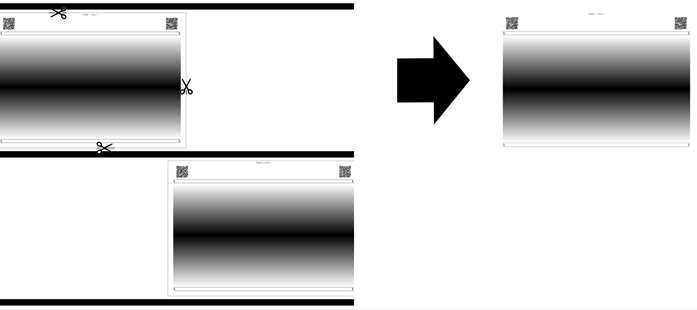
Cut out the individual panels from the printed target images. The dashed lines act as a guide for cutting.
Place a target panel on the scanner and press the Scan button. Ensure the printed target is correctly positioned using the triangle, making sure that it aligns with the triangle on the scanner (see troubleshooting section for scan problems).
Make sure all targets are scanned once, in the correct orientation.
As the scans are successfully collected, they move from the "To Scan" column on the left to the "Scanned" column on the right.

The Create button becomes available once all scans are complete (that is, no scans remain in the "To Scan" column).
Create and update SPC
The final step is to process the scans, which creates a calibration that is added to the SMD file selected in the first step.
To start the process, press Create.
Once the calibration is generated, the SMD updates automatically and sent back to SPC.
You need to apply the newly updated SMD file in SPC before the changes take affect.